1. Bring the Right Gear
Lenses
A wide-angle lens is my top choice of lens for seascape photography.
Compared to other lenses, a wide-angle lens allows you to capture a greater scope of your scene. This means you can capture more of the unique details of coastal scenes, such as rocks, waves, water pools, in a single frame.
Wide-angle lenses are also great at creating a sense of three-dimensionality in your photograph. Whereas telephoto lenses compress perspective, wide-angle lenses expand it by creating the illusion of your foreground being closer and the horizon being far away.
Wide-angle lenses are also known for their wide depth-of-field. This is often ideal for seascape photography, where you’ll usually want to capture most of the frame in sharp focus.
| Brand | Focal Length | Maximum Aperture | AF Motor | Price |
|---|---|---|---|---|
| Nikon | 14-24mm | f/2.8 | Yes | Check Price |
| Sigma | 14-24mm | f/2.8 | Yes | Check Price |
| Canon | 11-24mm | f/4 | Yes | Check Price |
| Nikon | 16-35mm | f/4 | Yes | Check Price |
| Canon | 16-35mm | f/2.8 | Yes | Check Price |
| Sigma | 18-35mm | f/1.8 | Yes | Check Price |
| Sony | 16-35mm | f/2.8 | Yes | Check Price |
| Sony | 14-24mm | f/4 | Yes | Check Price |
Resource: Lens Radar
Tripod
Using slow shutter speeds is necessary if you’re trying to capture the movement of waves.
Thus, for coastal photography, you will need to use a tripod.
A tripod is an essential tool for all long coastal photography. It helps prevent camera shake when capturing the movement of the waves with slow shutter speeds.
I also highly suggest that you bring a sturdy, quality tripod. A cheap, flimsy tripod may flip over or shake when the tide comes in or when it gets windy at the beach.
If you prefer not to carry a heavy tripod, consider bringing one that comes with a hook you can use to add weight to your tripod. With these hooks, you can use your camera bag for added stability.
Finally, I recommend using a tripod that can be broken down into parts. Sand can get in the small crevices of your tripod, and being able to take it apart is the most convenient option for cleaning. If your tripod can’t be taken apart, it may very well become irreversibly packed with sand after a beach shoot.
The best tripods can be taken apart and cleaned. This quality is essential in seascape photography as there is no way to avoid sand getting inside your tripod. This type of tripod is typically pricier than regular ones, but are built to last and are well worth their price.
Always remember to clean your tripod when you get home from a beach shoot. Saltwater and debris are bound to get all over it, so you’ll need to clean it promptly.
When setting up your tripod, try not to bury your tripod’s locking mechanisms under the sand. More than any other part of your tripod, these are highly susceptible to sand damage. For example, if your tripod has a twist or flip locks on the legs, be sure they stay above ground.
When it’s time to pack up the tripod, inspect the tubing for any grains of sand. Remove all debris before closing them. If any sand or debris is left, it could scratch the tripod or make the legs stick.
To extend the life of your tripod, take the tripod apart and clean it thoroughly as soon as possible after your beach shoot. This will minimize any damage done during the shoot.
If you are in need of a tripod that can withstand the elements of the shooting on the beach then the Manfrotto Befree Carbon Fiber Tripod is your best bet.
It offers stability and protection against the elements along with the ease of use for beaches.
If you are shooting and the waves are strong your tripod may move. To prevent this add some additional weight to your tripod.
You can do this using a tripod hook or a tripod weight bag. Many tripods don’t come with a hook or somewhere to attach a hook efficiently.
If this is the case for you use a weight bag, I recommend the Vanguard Stone Bag. This will attach to any tripod and allows you to add weight to make your tripod steady.
I recommend finding some stones, rocks, or sand to add some additional weight.
I advise against using your other gear because if water splashes or you forget it will fall in the water.
I have placed my camera bag there for additional weight but never when i am near the water.
Tripod Spikes
When shooting on unstable surfaces such as mud or sand, tripod spikes can be invaluable.
Tripod spikes make it easy to drive tripod legs into the sand and secure them for stability. They are a great tool to prevent your tripod from moving as the water comes in and out of the ocean.
Most tripod spikes are no longer than three inches, making them easy to store in a side pocket or smaller pocket of your camera bag.
Some but not all tripod spikes come with a small carrying bag if yours doesn’t bring a ziplock to store them. This will prevent bits of sand from getting inside your camera bag.
Best Tripod Spike: 3 Legged Thing Stilettoz Spikes for Tripods
ND Filters
Making the water appear soft and smooth in your image almost always requires the use of slow shutter speeds and an ND filter.
ND filters reduce the amount of light that reaches the camera’s sensor, enabling you to utilize slow shutter speeds without overexposing your images.
ND filters vary in strength, the most common ones being two-stop, six-stop, and ten-stop. The higher the stop, the more light that is filtered from reaching the sensor.
When shooting coastal images during sunset or sunrise, I typically use a six-stop ND filter. This filter works well for making the water appear smooth, especially if the sun is positioned in front of the lens.
Using a three-stop ND filter can also work well for giving waves a silky smooth appearance. They are also great during sunrise and sunset, allowing you to use long exposures to capture flowing water.
Ten-stop filters work great if you are trying to shoot long exposure during the day. This filter allows the use of very long exposure times and is great for creating a dramatic mood in coastal images.
Bringing these three filters would usually suffice for photographing seascapes. If you feel the need to use a darker filter, you can always stack two filters together. For instance, you can stack the ten-stop and three-stop filter to create the same effect as a thirteen-stop filter.
ND filters follow multiple notational processes. The most common and easiest to understand is the “ND#” method. Using this notation, a one-stop ND filter is notated as ND2. It is referred to as ND2 because a multiplication factor of 2 is applied to the number of stops it reduces.
For example, a two-stop ND filter is notated as ND4, and a three-stop ND filter is notated ND6. This makes it quite easy to keep track of the number of stops of light you are reducing.
You can also use a special type of ND filter, a graduated ND filter. A graduated ND filter reduces light in a gradation. In most cases, the top portion of the filter is darker and applies more light reduction than the bottom half.
It’s common to use graduated ND filters during sunrise or sunset to correct for the stark differences in the brightness between the sky and the foreground. A graduated ND filter will help ensure that you can properly expose your sky and background.
If you are looking for an ND filter I highly recommend the Tiffen Variable Filter. This variable ND filter is perfect fro adjusting to the different lighting conditions during seascape.
It is adjustable from 2 to 8 stops of light making it versatile.
Most variable ND filters won’t go as high as 10 stops, so I suggest purchasing a few higher ND filters individually.
I recommend a 10-stop and 15-stop ND filter for those special cases when you need extra strong ND filters.
CPL Filter
Another filter that can be useful for seascape photography is a CPL Filter.
A CPL helps minimize distracting light reflected off wet rocks and other foreground objects. They also help boost saturation of color and vividness in images.
Just be cautious when selecting the strength of your CPL filter. Similar to an ND filter, CPL filters reduce the amount of light reaching the camera’s sensor, by around 1-2 stops. Avoid using CPL filters if you are shooting in low light situations or if you want to capture reflections.
If you are in need of a CPL filter, I recommend the B+W CPL Filter. B+W produces great filters that don’t break the bank.
This polarizers used high quality glass that won’t have a negative effect on your images. Plus the low profile design won’t disrupt you while you shoot.
Lens Cloth
Remember to bring lens cloth to protect your lens from water, spray, and mist. Aim to pack more than one in case you drop the one you’re using, or it becomes too damp. Also, remember to keep it in a place where it’s easily accessible, such as your pants or jacket pockets.
Lens Cloth: Microfiber Lens Cloth
Backpacks
Backpacks are also an essential item for this kind of photography, as shoulder bags and the like can fall in the water.
This will offer greater protection in the event your backpack gets wet. Even waterproof bags won’t protect your gear if it becomes fully submerged for an extended period, but they can withstand large amounts of water falling on your bag.
When choosing your camera bag, remember to get a bag that fits all your gear comfortably. Too much space or too little space can damage your gear.
Another important factor of a good camera bag is adjustable, padded bag dividers. This will ensure that your gear is protected and not hitting against one another.
Finally, if you are traveling long distances before reaching your destination, then you must get a bag that is comfortable to wear. I recommend a backpack with padded straps and a padded back. Backpacks disperse weight evenly among your muscles, making it comfortable to wear for long distances.
If you are looking for an inexpensive waterproof camera bag then Abonnyc DRLBP-CZ is a great option.
It extremely spacious and comes with a customizable interior making it easy to adjust to different situations.
It also comes with a waterproof cover for additional support against heavy rainfall.
If you are willing to invest in on a long term backpack then the Peak Design Backpack is a great option. This backpack is made with an outer hard cover nylon shell and water resistant coating.
This backpack is extremely durable and high quality. In addition, this backpack has a ton of space and is designed to make using your gear as efficient as possible.
Shoes
If you plan on shooting in a warm location, water shoes are a great option. These shoes are specifically designed to provide excellent traction on slippery environments.
Water shoes are also beneficial if when shooting close to or on the water as they won’t come off from the impact of waves as they hit your feet.
They will also dry quickly and allow you to transition from shooting to scouting with ease.
I recommend getting a pair with laces or straps and avoid water sandals. Water sandals can be useful if you are only shooting in light water, but you are subject to the particles inside water getting inside your sandal and touching your feet.
Closed water shoes with laces offer the best support, traction, and protection from the elements. This is especially true if you are shooting in heavy water or doing a large amount of physical activity to reach your destination.
I recommend SIMARI Water Shoes, it is extremely comfortable and has a durable sole to protect you against anything hard or sharp you may step on. This shoes drain very well so no water gets caught in your shoe and they also dry very quickly.
If you plan on staying on dry land or not doing any major hiking over rough terrain, wearing sandals or flip-flops may also work. Just make sure you avoid locations where there is thick mud. Loose shoes tend to get stuck on these surfaces, making it very difficult for you to move around.
One of the most well known sandals is Birkenstock. They make quality, sturdy sandals that with sufficient support to protect you against uneven or hard surfaces.
Remote Shutter Release
If you plan to use shutter speeds longer than 30 seconds, then a cable release is a must-have.
After 30 seconds, your camera will turn to Bulb mode. Without a remote shutter release, you’ll need to physically hold the shutter release button to keep your shutter open past 30 seconds.
This could be cumbersome, if not impossible, to do in most cases.
If you don’t own one yet and are planning to buy one, I’d recommend a mid-range priced cable release.
In my years as a photographer, I’ve seen inexpensive, knock-off brand cable releases that don’t even make it through one use. But, on the flip side, I’ve also seen advanced intervalometers lose battery power on location and become completely worthless.
Find a balance between these two prices while focusing on durability and functionality.
The PIXEL shutter release is just that. It offers great functionality, working both as a wired or wireless option. Plug with a LCD screen on the remote you have access to much more settings.
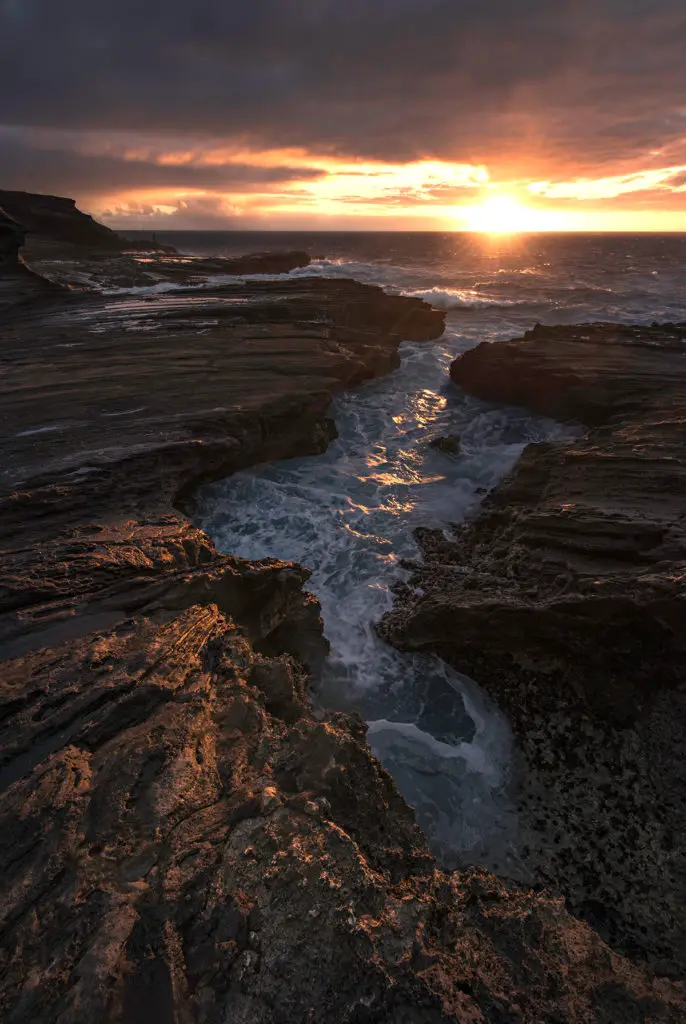
2. Shoot at Sunrise or Sunset
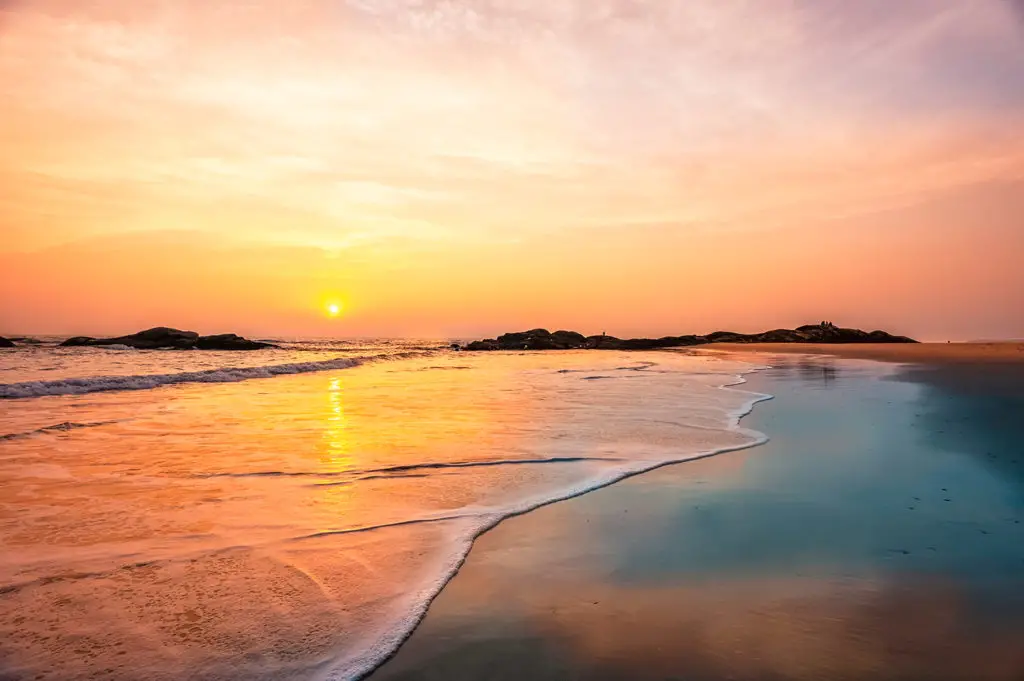
Similar to most types of landscape photography, pictures of seascapes are often best created during sunrise or sunset, also known as the golden hour.
The light at this time is much softer, making it the perfect setting for outdoor photography. Also, when the sun is low on the horizon, the colors in the sky transform into warm, vibrant colors ideal for making beautiful pictures.
Pay special attention to objects that look especially striking when illuminated by the warm light. In particular, pay attention to the rocks around you as well as the colors of the waves. These visual elements tend to be stunning at this time of day.
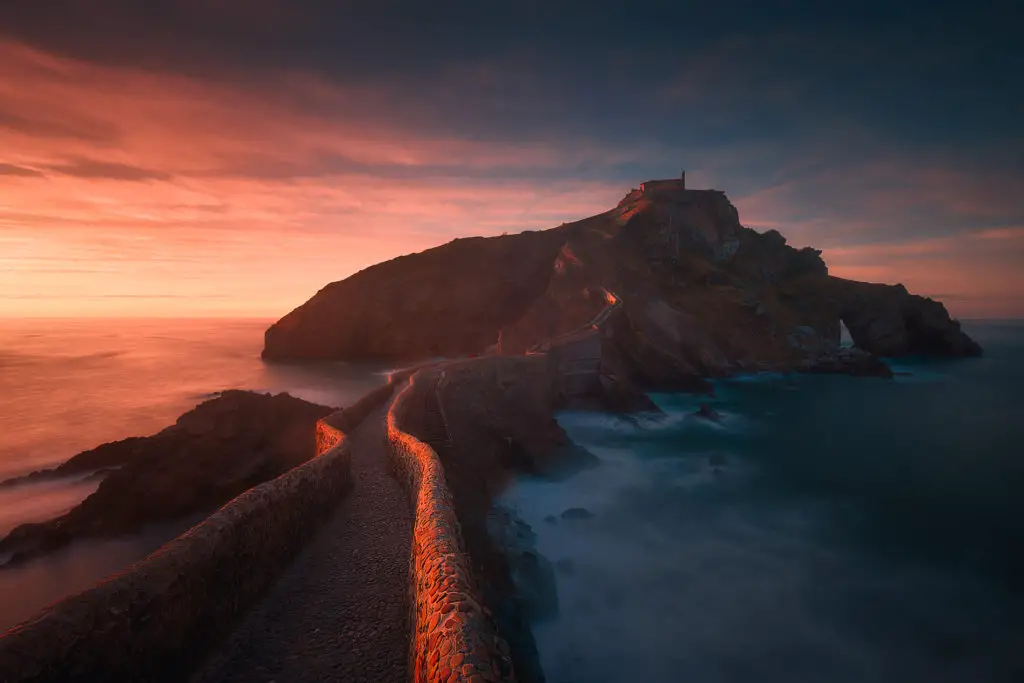
I recommend you arrive early and stay late.
Aim to arrive at the location at least an hour before the Golden Hour. Great light typically starts before the sun rises or sets. Arriving early ensures that you’ll have enough time to get set up and reduce the risk of missing out on the great lighting opportunities.
Staying late is equally important, especially during sunset. Some of the most breathtaking colors can unfold just as the sun has gone below the horizon. Stay as late in the location as possible. And if you can, try to wait till dark before leaving.
Resource: The Best Time To Take Pictures Outside: A Complete Guide
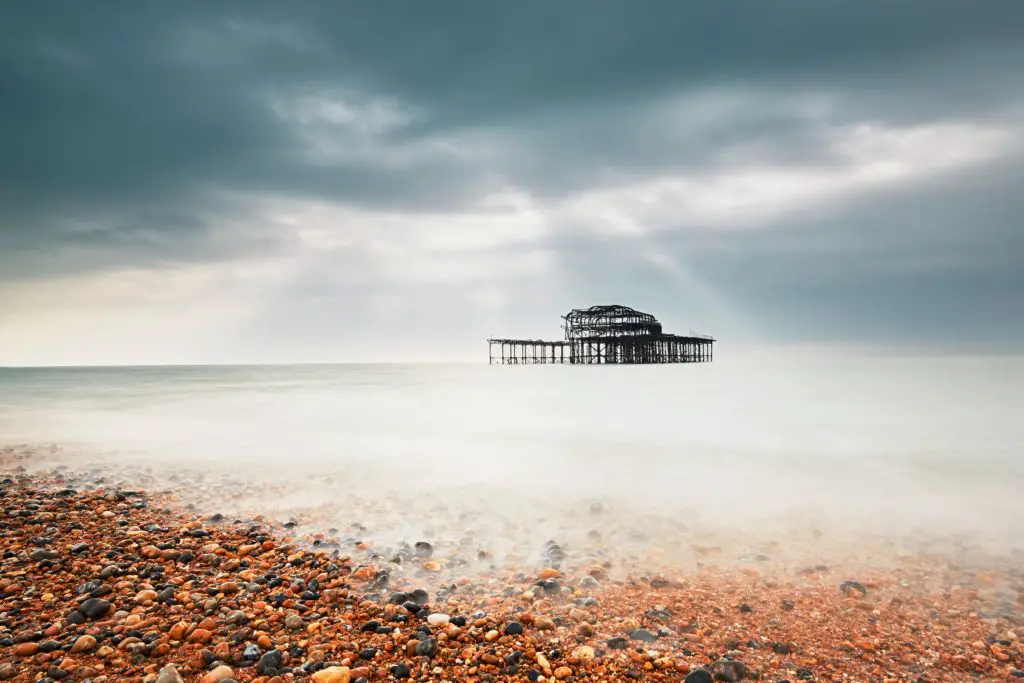
3. Pay Attention To The Weather
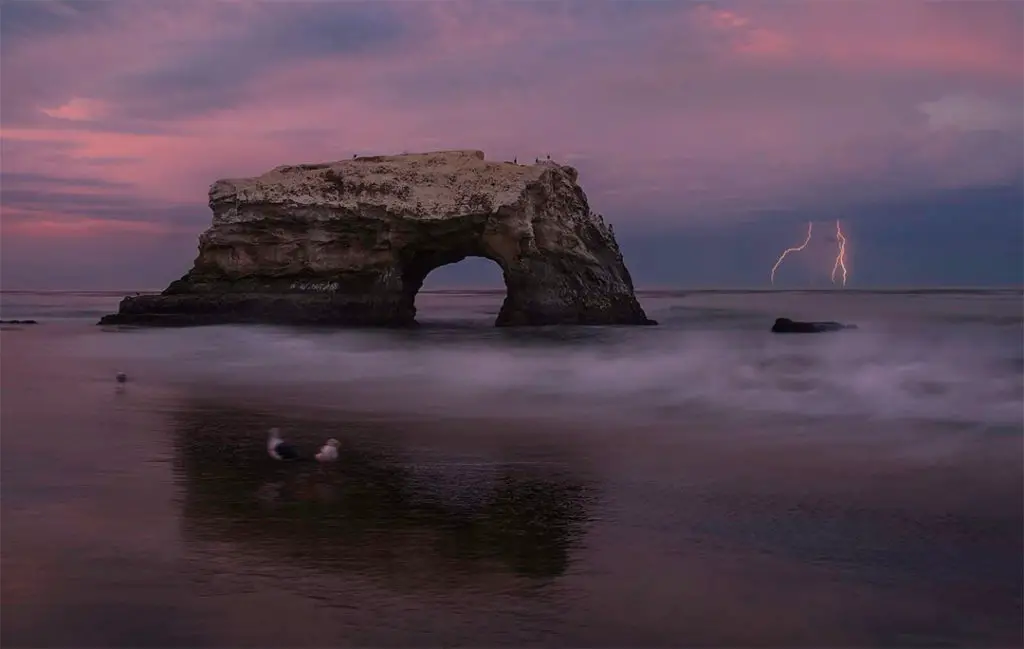
While great images can happen on any day, stormy days tend to produce the best scenes for seascape photography.
In most cases, cloudless days will produce dull skies and are not ideal for photographing seascapes.
In contrast, stormy skies make for a dramatic composition. This can be true, even if you go out to shoot seascapes in the middle of the day.
I particularly enjoy photographing seascapes in black and white on overcast days. Using a 10-stop ND filter, you can create unique compositions despite the inclement weather.
Plus, since beaches are usually empty when the weather is poor, you’ll have the whole place to yourself. Not only will taking photos during stormy weather provide you with great compositional opportunities, but you’ll also won’t have to worry about avoiding people when composing your images.
To track the weather, I recommend using Accuweather or NOAA. These websites both have mobile apps that make it easy to track detailed weather information on the go.
While you can get away with using the weather app that comes installed on your smartphone, download one of the apps above will give you more useful information when your planning and scouting for locations.
4. Scout Your Location
In seascape photography, ideal lighting can happen at any time, so it’s important to be ready for it.
Aim to arrive early at your location. Take the time you take to learn about the area and find interesting compositions. This way you’ll be prepared as soon as the conditions are right.
When possible, I suggest scouting your shooting location during the midday. The light in the early mornings and late evenings are usually ideal, so it’s best to save this time for shooting.
Also, try to re-visit your location several times. Doing so will allow you to study it under different lighting conditions and is the best way to find the best compositions available.
5. Consider The Tide

Being knowledgable about the tide is invaluable in seascape photography.
Some locations are more picturesque when the tide is low, while others are more ideal when it’s high.
When scouting a location, check what the tide is. It can be that the composition you found only works during low tide and is submerged in water during high tide.
Further, the tide can also affect the movement of water. Typically, low tides provide more water movement away from the shore while high tides provide more water movement towards the shore.
To track live tide data, you can use Tide Forecast. This site offers a live view map and tide tables of the entire world. This will allow you to find detailed information on the tide, current, and future conditions regardless of where you are.
This site is excellent because it tells you exactly when the next low tide or high tide is and approximately how long it will last. This information is useful when you are planning your photoshoot.
6. Use the Right Exposure Settings
Shutter Speed
The appropriate shutter speed to use in seascape photography depends on several variables, such as the available light, water’s movements, and the effect you’re trying to create in your image.
Depending on how fast the water is moving, you can use shutter speeds between ¼ to 2 seconds to create soft and blurry water textures.
In general, to create a balance of softness and detail in the waves, I find that using a shutter speed of ¼ of a second is often best. With this shutter speed, I can catch the waves’ general structure with a touch of softness.
For most scenarios, exposures longer than ½ of a second will not capture distinct forms of the waves. These types of shutter speeds are often best to create water effects that have a smooth and dream-like quality to it. When photographing water rolling over rocks in your foreground, for example, using shutter speeds above ½ of a second will provide you with soft textures of water as the tide goes over the rocks.
If you want to freeze the movement of water, you’ll want to use faster shutter speeds. This will typically range from 1/250-1/1000, depending on how big the waves are and how fast the water is moving.
In the end, what works best is experimenting with a variety of shutter speeds until you figure out which option creates the visual effect that you’re going for.
Resource: How to Use Your Camera: Understanding Exposure
Aperture
When photographing seascapes, you’ll generally want to keep most of your frame in sharp focus. This means using a narrow aperture is typically ideal.
Using a narrow aperture allows you to create a deep depth of field which keeps both your foreground and background in sharp focus.
For seascapes, I’ll typically set my aperture between f/9-f/14, depending on the amount of light available. If it’s too bright or if I am trying to create a sun-star in my shot, I will use narrower apertures, around f/14-f/16.
You may also be able to skip the ND filter by using a narrow aperture. If the light is not too bright, you’ll typically be able to achieve long exposure without an ND filter using apertures between f/14 and f/22.
Resource: How to Use Your Camera: Understanding Exposure
ISO
Although using a high ISO will enable you to create brighter images, it will also increase the presence of noise in your image. So, you’ll want to use the lowest ISO value possible.
Try not to increase your exposure using ISO without trying to adjust your shutter speed or aperture settings first.
Raise your ISO if you can’t use longer shutter speeds without it resulting in motion blur. Or if you can’t lower your f-stop without compromising your desired level of sharpness in your image.
That said, don’t be afraid to raise your ISO to reach your desired exposure. An image with a little noise is always better than a blurry or underexposed one.
Resource: How to Use Your Camera: Understanding Exposure
7. Shoot in Raw
Unless you don’t intend to edit your images, I recommend shooting with a RAW format.
Compared to JPEGs, RAW images have a higher bit depth, which means they have a wider tonal range and larger color gamut.
The wider tonal range enables the camera to record the different levels of brightness in your scene more accurately. This feature of RAW images can be invaluable when taking photos of seascapes, particularly in scenes with high contrast such as sunrise and sunsets.
Raw formats also have larger color gamut compared to JPGES. While an 8-bit, JPEG image only translates into 16 Million possible colors, a 16-bit, RAW photos can have a total of 281 Trillion possible colors.
Having a higher bit-depth gives RAW images a larger pallet to produce, resulting in images with more accurate colors. As a result, RAW images have smooth color transitions and less banding artifacts than JPEGs.
Both the large color gamut and wide tonal range provides you with greater editing capabilities. That is, with RAW files, you’ll have more freedom to adjust essential components of your image, such as white balance, highlights, shadows, and contrast, without creating any issues.
8. Use Autofocus
Whether to use manual focus or autofocus depends entirely on the situation and your preference. But, in most situations, using autofocus is the best option for seascape photography.
Compared to manual focus, autofocus is typically faster and more accurate. And although different cameras vary in autofocus speed, most modern cameras’ autofocus works well.
Of course, some photographers can manually focus their cameras at fast speeds. But, anomalies aside, the autofocus is the clear winner as far as speed is concerned.
That said, using manual focus can be more advantageous in certain situations.
For instance, when photographing scenes with low contrast levels, using manual focus is typically more precise than autofocus systems.
Similarly, when taking pictures at low light conditions, such as before sunrise or after sunset, manual focus will typically be your best option.
Shoot in Raw
Unless you don’t intend to edit your images, I recommend shooting with a RAW format.
Compared to JPEGs, RAW images have a higher bit depth, which means they have a wider tonal range and larger color gamut.
The wider tonal range enables the camera to record the different levels of brightness in your scene more accurately. This feature of RAW images can be invaluable when taking photos of seascapes, particularly in scenes with high contrast such as sunrise and sunsets.
Raw formats also have larger color gamut compared to JPGES. While an 8-bit, JPEG image only translates into 16 Million possible colors, a 16-bit, RAW photos can have a total of 281 Trillion possible colors.
Having a higher bit-depth gives RAW images a larger pallet to produce, resulting in images with more accurate colors. As a result, RAW images have smooth color transitions and less banding artifacts than JPEGs.
Both the large color gamut and wide tonal range provides you with greater editing capabilities. That is, with RAW files, you’ll have more freedom to adjust essential components of your image, such as white balance, highlights, shadows, and contrast, without creating any issues.
9. Wait for the Perfect Timing

Timing is everything when trying to capture the movement of water in your images.
Although you can use the spray and pray method, you’ll likely end up having a high volume of non-quality shots.
Waiting for the perfect conditions may take more time and patience, but it maximizes your chances of getting amazing images.
When you should press the shutter button depends on the behavior of the water around you, and the effect you are trying to create.
If you want to freeze the crest of the wave right before it crashes, press the shutter is when the water begins to crest at the peak of the frame. For this type of effect, I recommend using shutter speeds between ¼ to ½ of a second.
If you want to use the water to create leading lines, the best time to press the shutter is when they recede – not when they are coming in. I also recommend continuing to shoot until the water finishes receding to optimize your chances of getting the best possible leading lines.
That said, there are times when this may work. For instance, if you want to show water hitting the rocks.
To capture the drama as the water hits rocks, press the shutter as the waves come in. This is a great way to freeze water and create a striking look of splashes.
When capturing water movement, using a remote cable release can also be helpful. Although certainly not mandatory, having one can help minimize blurry images resulting from accidental camera shakes.
10. Use Exposure Bracketing
 Photographing seascapes during sunrises and sunsets typically produce scenes with high contrast or high dynamic range.
Dynamic range is the ratio between the lightest and darkest elements in an image. When the sun is low on the horizon, this gap tends to increase, making it difficult for your camera to capture all of the details in the scene within a single image.
In most cases, if your scene has a high dynamic range or high contrast, you’ll either need to expose for your highlights or your shadows. This means that you’ll have to leave one of the tonal ranges incorrectly exposed.
To avoid compromising between the two tonal ranges, you can bracket your exposures and then blend them during post-processing.
Exposure bracketing or is when you take multiple photos at different exposure levels.
To bracket your exposure, use the Automatic Exposure Bracketing (AEB) setting in your camera.
You can adjust the number of underexposed and overexposed images shots your camera will take when using AEB based on what you need.
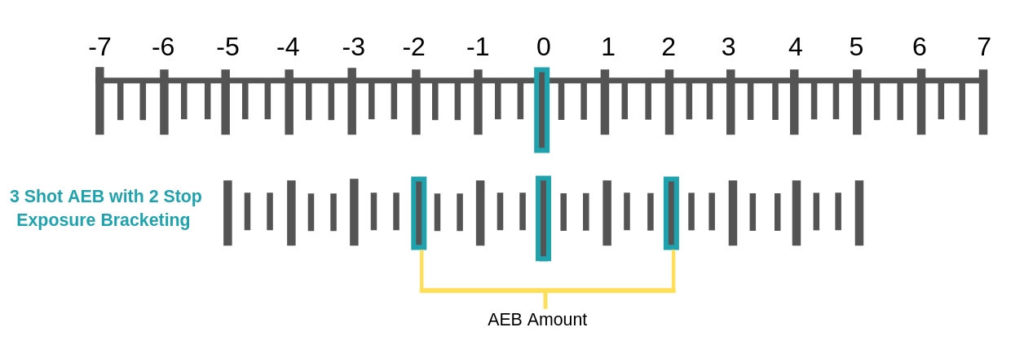
For instance, if you set your camera to a five-shot AEB, it will shoot two underexposed, two overexposed, and one properly exposed image. On the other hand, you set your camera to a three-shot AEB; it will shoot one underexposed, one overexposed, and one properly exposed image.
When shooting in AEB mode, you can also adjust the number of stops your camera captures. Most cameras offer 3, 5, and 7 stop AEB settings. The number of shots determines how many underexposed and overexposed images you will capture.
For example, a five-shot AEB bracketed for 1 stop will capture two underexposed images, two overexposed images, and one properly exposed images. The two underexposed images will be one-stop and two stops underexposed while the two overexposed photos will be one-stop and two stops overexposed.
Once you’ve taken multiple images at different exposures, you will need to blend them using post-processing software. There are two common ways you can do this.
The first is by manually selecting the elements you want from each photo and combine them into one picture. The other is by using HDR software, which will manually blend the images for you.
Either way, shooting bracketed images and then blending them in post-processing will enable you to create an image with every element properly exposed.
11. Expose for Highlights
If you prefer not to bracket your images, a good alternative is to expose for your highlights.
When dealing with high contrast scenes, exposing for highlights will allow you to preserve as many details in your image as possible.
This is true, even if it entails leaving the rest of your photo dark or underexposed. Since most modern cameras are so powerful, you could almost always recover the underexposed digital information using digital software.
When exposing for highlights, remember that it’s ok to leave some elements overexposed. This is expected, especially around your light source.
Plus, slightly underexposing images tend to give them richer colors. If you’re lucky enough to be shooting a vibrant sky, exposing your highlights can make your picture look more compelling.
12. Include a Sunburst in Your Composition
Adding a sunburst in a composition is a great way to make your image stand out. And they are very easy to create.
To create a sunburst, set your aperture anywhere from f/18 or f/22. The high-f-stop will create a small aperture opening, which causes light to bend around its edges as it goes through the lens. This bending of light is what creates the “star” look.
How your sun star appears in your image depends primarily on the type of lens you used to photograph it. Specifically, the number of blades in your lens aperture will determine the number of rays your sun star will have.
If you used a lens with an even number of blades, the number of rays your sunburst will be equal to the number of the aperture blades in your lens. However, if you use a lens with an odd number of blades, the number of rays in your sunburst will be twice the number of your blades in your aperture.
To enhance the effect of a sunburst, find a way to block the sun partially. Partially obscuring the sun will exaggerate the sunburst effect by diffracting the sunlight before it goes through your lens.
You can partially block the sunlight in a variety of ways, such as photographing it through a tree, a mountain ridge, or the horizon.
Try to frame your composition from different angles. A subtle shift in framing can have a significant impact on diffraction and the appearance of your sunburst.
Finally, when creating sunburst, ensure that your sensor is free of dust. Specks of dust become most apparent when using small aperture settings.
13. Use Reflections

Seascape photography is perfect for creating incredible mirror reflections.
You can experiment with perfect reflections through seaside elements such as shallow pools and wet sand.
If you plan to photograph shallow pools to create reflections, consider bringing a polarizing filter (CPL). A polarizing filter can help eliminate glare on the water, enabling you to capture reflections.
Using a CLP filter is also useful in bringing out the blues in the sky and enhance the vibrancy of the colors in your scene.
If you plan to photograph reflections using tranquil pools, aim to shoot on a day when there is as little wind as possible. Wind blurs the water’s surface and causes ripples that can ruin an otherwise perfect mirror image.
If you’re shooting on a windy day and want to create a perfect mirror reflection, consider using wet sand instead. Although this is often not as smooth as shallow pools of water, it works excellent in mirroring large visual elements such as the sky or sea stacks.
To photograph reflections using wet sand, set your camera to slow shutter speed (½ second or slower). Once you’ve settled on shutter speed, press your shutter as soon as the water starts receding into the ocean.
Using an ND filter can also help when dealing with this type of composition. As mentioned, ND filters allow you to shoot long exposures without overexposing your images. Using long exposures is what makes it possible to produce smooth velvety water that creates incredible reflections.
For both wet sand and shallow pools, using a narrow aperture is generally best. A narrow aperture will enable you to capture reflections with great detail. In most cases, an f/8 will work for small areas, while f/11 will be better for landscapes.
You can also create reflections with rippled water. Ripples of water can create unique abstract reflections, especially shot using telephoto lenses.
The specific shutter speed you should use in this case will depend largely on how fast the water is moving. You’ll often need to use faster shutter speeds for slow-moving water compared to fast-moving water. Similar to photographing wet sand, I suggest you start with a shutter speed of ½ second and adjust from there.
For abstracted reflections, consider experimenting with wider apertures, such as f/4 and below. Wide apertures will allow you to add depth and isolate textures by keeping only a small area of your frame in sharp focus.
When trying to capture water reflections, aim to photograph in the early morning or late evening. Although possible, photographing water reflections during the midday can be challenging.
When the sun is high in the sky, it typically produces glares and shadows, which can easily ruin the aesthetics of your composition.
Resource:
Long Exposure Beach Photography: The Complete Guide
How to Photograph Water: The Ultimate Guide
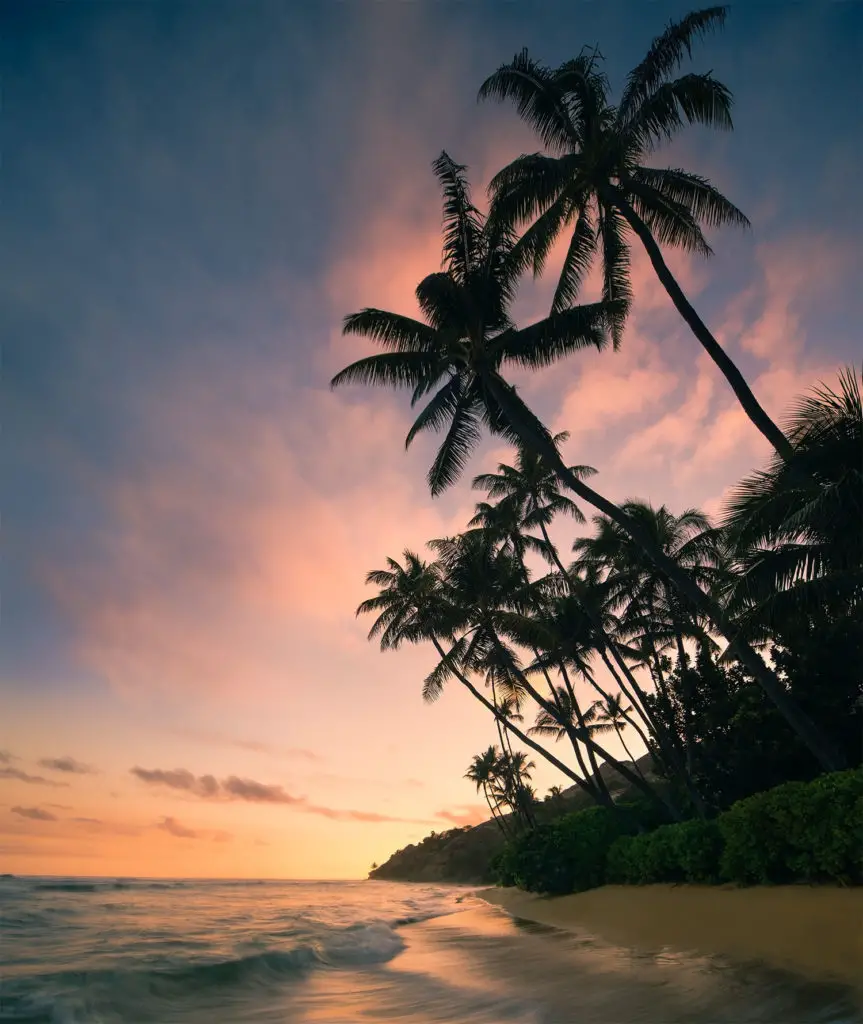
12. Include a Foreground Element
Including interesting elements in your foreground is a great way to create unique seascape images.
Beaches are filled with a variety of distinct elements you can add in your foreground. The coast provides an endless variety of elements you can capture, such as soft shifting sands, rolling waves, rocks, and tranquil pools.
Small round pebbles in wet sand is a favorite shot of mine. These pebbles cause receding water to leave interesting patterns as they return to the ocean.
Placing wildlife in your foregrounds, such as seagulls and starfish, is also a great way to make unique and engaging images.
Always make time to explore your location to find interesting elements you can include in your foreground. Doing so will allow you to capture images with features that will captivate your audience.
13. Level Your Horizon
Although you can level your horizon in post-processing, it’s best to do it when composing your shot. Fixing an off-level horizon in post-processing can lead you to make unnecessary compromises in your composition.
For instance, it may require that you crop the edges of your image. If there are key compositional elements in that area, you may run into problems while leveling your horizon.
The easiest way to level your horizon is to use a tripod. Using a tripod will keep your camera fixed in one position and allows you to make minor adjustments accurately.
There are some other tools you can use as a photographer to help you level your horizon.
The first tool you can use is your camera’s gridlines. Most DSLR cameras allow you to apply a 3×3 overlay to your live view screen. This will make it easier to compose your images and level your horizon.
To turn on the gridlines, select the menu button on your camera and select “gird display.” Depending on your camera option, you will either only have one grid option or multiple.
If your camera only has one option when you select “gird display,” you will be prompt to choose “yes” or “no.” To activate the gird, select “yes.”
If your camera has multiple gird options, when you select the “gird display,” you will be prompt to choose from a list of gird options. Most cameras will have an image of what the gird looks like next to the option. Select a grid with horizontal lines so you can level your horizon.
I recommend using the standard 3×3 or 6×4. These will make it very simple to level your horizon since you will get multiple horizontal lines to use as your guide.
Using your camera’s level feature can be extremely useful as well. However, I recommend activating it once you’ve settled on a composition as it can be a little distracting.
If you want to keep your live view clean and strictly for composing your images, you can use a bubble level to make sure your horizon is level.
In most cases, the bubble level connects to the hot plate on your camera. It functions exactly like a traditional carpentry bubble level. There is an air bubble suspended in liquid, and when the camera is leveled, the air bubble will go to the center.
14. Utilize the Rule of Thirds
The rule of thirds is a compositional technique that leverages asymmetry to create dynamic and visually exciting compositions.
It involves equally dividing your frame into nine parts using two horizontal lines and two vertical lines.
To use the rule of thirds position, your focal point along one of the lines or on one of the four intersections. This naturally places the point of focus off-center, creating aesthetically pleasing images through asymmetry.
To create asymmetry, the rule discourages you from positioning the horizon in the center of your image. Instead, the rule suggests that you align your horizon along one of the horizontal lines. This naturally places a heavier emphasis on either the foreground (land) or the background sky, creating asymmetry.
If you prefer to highlight your foreground, align the horizon with the upper horizontal line. On the other hand, if you would prefer to put more emphasis on the sky or your background, the rules suggest aligning your horizon with the lower horizontal line.
Once you have your horizon aligned, position your focal point along one of the lines or on one of the four intersections. This naturally places your focal point off-center, which again utilizes asymmetry to create aesthetically pleasing images.
Resource: How to Use Rule of Thirds in Photography
Bonus Tip: Consider Shooting During Midday
Considering the amount of ambient light present during the daytime, it’s not surprising that most images created during this time are taken using fast shutter speeds.
However, this doesn’t always have to be the case. With the right tools, you can take amazing images using slow shutter speeds during the day.
For instance, I like using a ten-stop ND filter and long shutter speeds to create a dream-like appearance of fog in the water. The appropriate shutter speed to use will vary depending on two main factors.
The first is how fast the water is moving and the quality of light available. The more movement in the water, the shorter the shutter speed you’ll need to use. But in general, using a shutter speed of 20 seconds to one minute should work just fine.
Another factor to consider is the quality of light available to you. Shooting under bright, cloudless day may require you to use shorter shutter speeds than shooting on an overcast day.
Overcast days may require you to use longer shutter speeds than a bright cloudless day.
The same principle goes for cloud streaks. Although your shutter speed for creating this effect will also heavily depend on how fast the clouds are moving. Slower clouds will require you to use longer shutter speeds than faster clouds.
Above all, you’ll need a dark ND filter with a minimum of six stops reduction. This is one piece of equipment that you can’t glaze over – it’s crucial for long exposure shots in daylight.
Ideally, you’ll need a nine or ten-stop ND filter. Only with a strong ND filter will you be able to have an exposure longer than 30 seconds during the day.
The ND filter that you pick should enable you to use a one to five-minute exposure during the day. The ND filter you need will depend on the intensity of light but consider a ten-stop ND filter and higher.
An ND filter that lacks in strength simply won’t do the trick – daylight requires this tool to achieve long exposure shots.
A Few Things You Need to Consider with Day Time Photography:
When you use an ND filter with over six stops, a magenta hue will be visible in color images.
This phenomenon happens because while ND filters cut out light that can be seen in the visible spectrum, infrared light still comes through.
The magenta cast isn’t widely liked by photographers. Unfortunately, it’s tricky to remove it in post-processing. If this is an issue for you, consider converting your image to black and white.
Vignetting is another issue that you may run into. Vignetting is when the corners of a photo darken, and it happens when the ND filter blocks out light from the scene.
Filters with a thick mount are more likely to create this effect. Vignetting is also more common when you “stack” filters.
If this is an issue for you, you can try minimizing the vignette in post-processing, or you can crop out the corners of your image.
Resource: The Ultimate Guide to Long Exposure Photography
