
Long exposure photography is a great way to create unique and exciting images.
It allows you to add different tones, moods, and textures in your images.
You can capture the relaxing movement of a waterfall or the busy lives of people in a city.
You can also photograph a variety of subjects, including moving cars, waterfalls, star-trails, and architecture.
Whatever subject you choose, using a long exposure can help you create images that captivate and inspire the imagination.
I’ve had a few people ask me how I go about shooting long exposure images, so I decided to write this guide.
What is Long Exposure Photography?
Long exposure is a process that gets its name from the use of the long-duration shutter speed.
The shutter speeds for most type of photography usually ranges between 1/60 and 1/4000 of a second.
However, there are certain situations where we want to create certain effects that can make using longer shutter speeds a better option.
For example, you may want to blur moving water or the movement of clouds in the sky.
This technique is called long exposure photography.
While there isn’t a specific value of shutter speeds that are labeled as long exposure photography, a general starting point would be shutter speeds less than 1/25 of a second.
Shutter speed values of 1/25 and slower are typically used to create a blur.
This blurring effect helps capture both movement and the passage of time, which can be fascinating in a photograph.
General Long Exposure Settings
ISO
When taking long exposure photography, use the lowest ISO possible. Ideally, an ISO of 100 works best.
By using a low ISO, you’ll be able to lengthen your exposure time without risking overexposure.
Also, the low ISO will spare your images from the noise brought on by a high ISO.
Aperture
The appropriate aperture setting will vary depending on the ambient light available and the effect you’re trying to create.
But, when necessary, when using slow shutter speeds, you can use a small aperture to help you prevent overexposure.
This is especially helpful if you are not using an ND filter to control the amount of light entering your lens.
Using smaller apertures can also help you to get most of your image in sharp focus.
A small aperture will provide you with a larger focus plane, ensuring that objects in both the background and foreground will be focused.
I recommend having your aperture settings between f/8 and f/13, specifically for most outdoor and nature photography.
To be sure, you can try to find and use your lens’ aperture sweet spot.
The aperture sweet spot is an aperture setting that creates the sharpest images when the lens is focused at infinity.
To find your lenses sweet spot, you can test your lens, or you can follow a rule of thumb.
The general rule of thumb states that the aperture sweet spot is typically 2-3 stops from the maximum aperture.
Shutter Speed
As mentioned above, shutter speeds lower than 1/4 of a second are generally accepted as long exposure photography.
But, the specific shutter speed that you’ll want to use for a long exposure is going to depend on different variables.
In particular, it will depend on your subject, the effect you’re going for, and the amount of light available.
We’ll discuss shutter speeds more in-depth later in the article.
Shooting Mode: Manual
For long exposure photography, you will need to use a camera that allows you to change the shutter speed settings.
Most cameras will allow you to do this, including DSLRs, mirrorless, and some point-and-shoot.
You may even be able to take long exposure photos with a smartphone.
Depending on the model, your camera app may support the required settings, or you may be able to download an app that will.
To change the shutter speed settings on your DSLR or mirrorless, you can use either a manual or shutter priority mode.
If you are using a Nikon camera, the camera model dial will read “M” for manual and “S” for shutter priority.
For Canon users, the dial will read “M” for manual and “Tv” for shutter priority.
For long exposure photography, I prefer to use manual mode as it allows me to have full control of my ISO and aperture settings as well.
File Format: RAW
When deciding on which file format to use for long exposure photography, I would suggest using RAW.
Long exposure photography is time-consuming and tedious.
So why not make sure you’re getting as much out of the situation as you possibly can.
Shooting in RAW will ensure that your long exposure shots are high quality and contain as much detail as possible.
Also, if you make any mistakes on the field, the editing flexibility of RAW images will come in handy.
For example, you can easily adjust white balance, highlights, shadows, contrast, noise, and sharpness when shooting in RAW.
Using RAW as your file format of choice, you’ll be sure to get the most of of your camera’s technology.
And you will put yourself in an excellent position to make the necessary adjustments during post-processing.
Gear
Use a Tripod
Other than your camera and lenses, your tripod is the most critical piece of equipment you’ll need for long exposure photography.
Tripods ensure that your photos stay sharp and free from camera shake caused by long exposure.
A sturdy tripod is essential. Cheap tripods lack stability and durability, so invest accordingly.
I recommend the Manfrotto Befree Carbon Fiber Tripod.
This is a quality tripod made by a trusted brand that won’t break the bank. It is easy to use and lightweight so you can easily move around and adjust your composition.
ND Filters
If you are taking long exposure photos in the daylight, you should use a neutral density filter.
Neutral density filters are built to minimize the amount of light that enters your camera.
These filters are great for managing exposure when doing long exposure in bright environments.
ND filters come in different sizes, including two-stop, six-stop, and ten-stop.
The numbers tell how strong the filter is. The higher the number, the greater the light reduction factor.
ND filters use many abbreviations. In my opinion, the easiest to understand is the Filter Factor Number.
The filter factor number begins with an ND and is followed by a number.
For example, An ND2 would be a two-stop ND filter, and ND6 would be a six-stop ND filter.
ND filters function like stops, meaning that each additional increase reduces the amount of light reaching the lens by half.
An ND2 reduces light by one stop or allows only 1/2 the amount of light as before.
Likewise, an ND4 filter would reduce light by two stops or allows only 1/4 the amount of light as before.
ND8 and ND16 (3 and 4 Stop ND filters) are best used at sunrise and sunset.
These filters will allow you to use long exposure times without overexposing during those bright sunning mornings.
An ND64 (6-stop filter) works great if you are trying to create a blurry, misty effect when photographing moving water.
To capture exposures of several minutes, you will need to have at least a 10-stop reduction in light.
If you don’t have an ND1000, you can stack several smaller ND filters.
10-stop filters are popular for photographing water of clouds in long exposure shots.
They can help to create a delicate effect when shooting at an exposure of around 2 minutes.
They are especially helpful when the clouds are moving fast, such as on the coast.
If you want to capture images with a 5 to 10-minute exposure, you will need a fifteen-stop or sixteen-stop filter. 15-stop filters are great for creating cloud streaks during bight lighting.
If you are looking for an ND filter I highly recommend the Tiffen Variable Filter. This variable ND filter is perfect fro adjusting to the different lighting conditions during seascape.
It is adjustable from 2 to 8 stops of light making it versatile.
Most variable ND filters won’t go as high as 10 stops, so I suggest purchasing a few higher ND filters individually.
Circular Polarizing Filter
If you’re trying to shoot photos of the water, you may want to invest in a circular polarized (CPL) filter.
CPL filters are great for reducing the reflections on water or glass, enhancing the colors of an image, and reducing the shine caused by bright light.
These filters are very easy to use. Simply, screw on the filter to the front of the lens and adjust the strength of the filter using the movable ring on the filter.
Avoid using the filter at full strength because it can cause an unnatural appearance in your images.
When using a CPL filter, there are a few key things you must remember.
First, CPL’s work best when your subjects are at a right angle with the sun.
If the sun is directly behind or in front of the object, then the polarizing filter will have no impact on the image.
If you are in need of a CPL filter, I recommend the B+W CPL Filter. B+W produces great filters that don’t break the bank.
This polarizers used high quality glass that won’t have a negative effect on your images. Plus the low profile design won’t disrupt you while you shoot.
Remote Shutter
The smallest movement can ruin a long exposure shot.
To help reduce the risk of camera shake when pressing the camera button, consider using a remote shutter.
While this isn’t a required piece of equipment, it can certainly be convenient to have.
If you don’t want to invest in a remote shutter, you can try to avoid camera shake by using the timer on your camera.
The PIXEL shutter release offers great functionality, working both as a wired or wireless option.
This is a shutter release with great functionality with a reasonable price tag.
Plus with a LCD screen on the remote you have access to much more settings.
Ideas for Long Exposure Photography
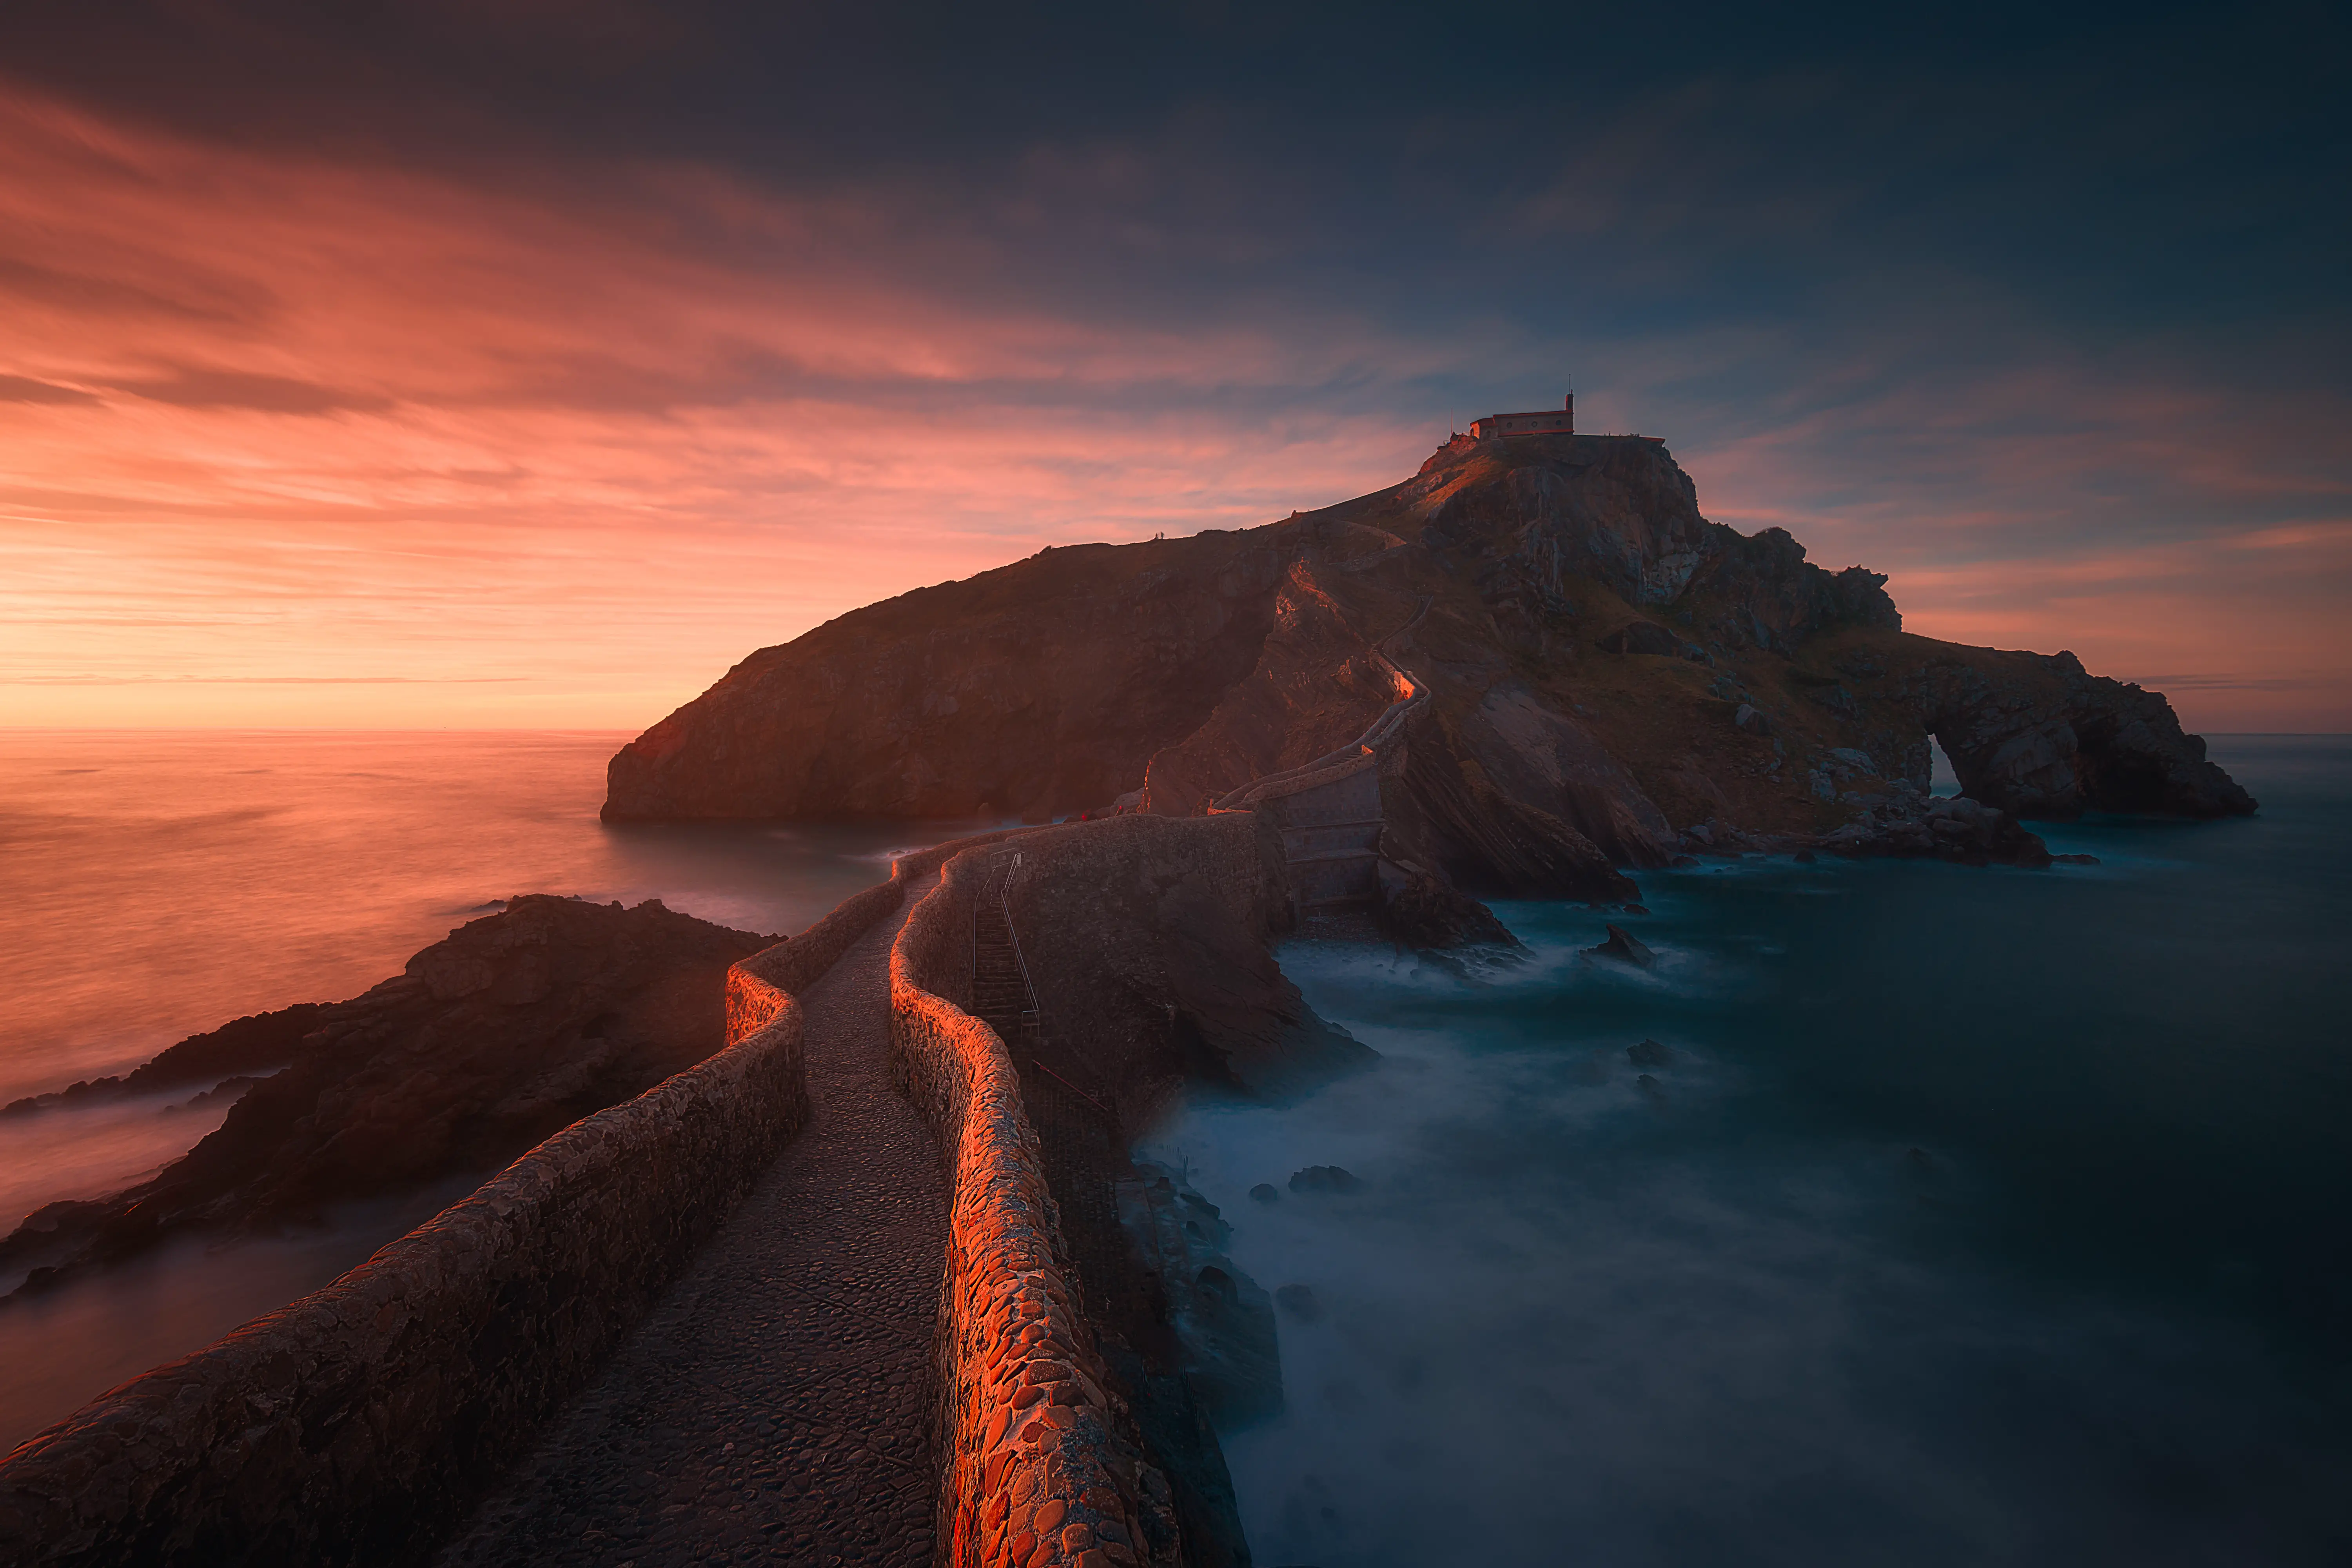
Coastal Photography

The shutter speed that you use for coastal photography is going to depend on several different factors.
In particular, you’ll want to consider the quality of ambient light, how fast the waves are moving and the effect you’re trying to achieve.
Each photographer is going for a different aesthetic preference, so your shutter speed may vary compared to others.
In general, setting your shutter speed at ¼ of a second should give you a soft water look but with enough detail to see the individual waves and peaks.
However, experimentation is key when photographing any moving water.
You must play with different shutter speeds so you can get an idea of which one will work best for you.
You may also want to opt for smaller apertures to when doing coastal photography.
Smaller apertures are typically ideal in coastal pictures as it lets you capture the entire scene in great detail.
Plus, using a smaller aperture will also help you lengthen your shutter speed without overexposure.
In some cases, you may even get away with doing long exposure without using any filters.
Keep in mind, this will only work if there isn’t a lot of ambient light.
Otherwise, it’s best to use a neutral density filter.
Bonus Tip:
The receding waves can move your tripod if it’s not securely mounted. This often results in a blurry and unusable image.
A good way to counteract this is by putting spiked feet on your tripod.
This tool will allow you to drive your tripod into the ground and make it more stable.
Waterfall Photography

Waterfalls are one of my favorite things to photograph. They crash in torrents, meander among rocks, and splash exuberantly in the sun.
Long exposure photography has a way of capturing these movements, transforming them into traces of soft textures.
The specific shutter speed you need to use will depend on the type of waterfall you are trying to capture.
Delicate waterfalls will require longer shutter speeds than delicate waterfalls.
If you’re photographing a large, rapid waterfall, you should aim to be in a range of ¼-1 second for shutter speed.
For the smaller waterfalls, you should aim to get a longer exposure.
Typically, between 1 and 4 seconds is a good range.
To get the most sharpness and level of detail in your image, narrow your aperture.
Narrowing your aperture also makes it possible for you to prolong the exposure time significantly. This is especially helpful if you are not using an ND filter.
Bonus Tip:
When photographing waterfalls, it might be helpful to bring a lens cloth in case your lens becomes wet from splashing water.
Remember to bring extra, in case you drop the one you or it just becomes too wet.
Also, make sure to put it somewhere easily accessible like one of your pockets.
Daytime Long Exposure Photography

Photographing moving subjects, like flowing water, clouds, or people walking, is sure to create a fascinating photograph.
Experiment with different exposure times to see which shutter speeds will create the effect you’re going for in your final shot.
For example, if you’re trying to create cloud streaks, you may have to use a shutter speed of more than a minute.
Using a shutter speed of more than 5 or 10 minutes make moving subjects disappear altogether.
You can use this technique to remove people from busy streets and sidewalks.
To prevent overexposure in your daytime long exposure photos, it is necessary that you use a neutral density filter.
Specifically, you should use one that is at least six-stops. However, a nine-stop or ten-stop is usually better.
In most cases, ND filters below a ten-stop will only work if hits partly cloudy.
Any ND filter below six-stops is typically insufficient for you to capture long exposures during the day.
If you don’t have a single filter that is strong enough, you can stack several filters to increase their light reduction power.
Otherwise, it may be best to hold off on shooting daytime long exposure photography.
In the meantime, you can continue capturing long exposures at night or in cloudy weather.
Bonus Tip:
Keep in mind that ND filters that are higher than six-stops can create a magenta cast in your photos. This is a result of the filter blocking out the light that is in the visible spectrum.
Typically, this effect is more extreme in cheap ND filters. Nonetheless, in my experience, even high-quality ND filters will have some color cast.
If this is an issue for you, you can try to fix it by adjusting your images white balance in post-processing
Removing the color cast in photo-editing can be difficult and may not always be successful.
If you’re unable to fix using editing software, consider converting your images to black and white.
ND filters can also create vignetting. This is simply because the filter itself can block some of the light.
You may be able to edit this to fix it, but you can easily crop it out as well.
Street Photography

Capturing the movements on busy streets and neighborhoods is a great way to use long exposure photography.
Try getting up high to take elevated shots with a clear street view. For this, I recommend you use a wide-angle lens with a slower exposure of ¼-1 second.
Also, consider utilizing straight lines such as lamp posts, buildings, and pedestrian crossing as a way to draw your viewer to a specific focal point.
You may also want to use a tripod to mount your camera. Although some photographers embrace camera shakes as an aesthetic feature when doing street photography.
Star Trails

To create star trails, you’re going to need a camera that can take very long exposures.
Some cameras that will work are Mirrorless and DSLR. Both of these cameras have Bulb mode that will allow you to leave your shutter open past 30 seconds.
As mentioned above, you should set your ISO as low as possible so that you can avoid noise in your photos.
Also, you’ll need to use a wide aperture to let in as much light as possible.
The exposure time you use is going to depend on specific conditions, so it can vary anywhere from 2 minutes to a few hours.
The best way to figure out what exposure time is right for the shot you want is to experiment.
The longer your exposure time, the longer your star trails will be.
You can also use the app Photopills. This app will let you know the estimated shutter speed required to capture star trails for a given condition.
Still, even with the app, I recommend that you experiment with your shutter speed to determine which one works best for the effect you are trying to create.
However, the longer your exposure time, the longer your star trails will be. Since the stars make a full orbit in 24 hours, that means they move about 15 degrees every hour.
But it is probably better to focus on getting a good exposure with bright star trails rather than the length of the star trails.
To start, you can test the image with 2-minute exposure time.
Keep doubling the time until you get a photo that you like.
Once you get close to what you’re looking for, you can adjust the exposure time by a few minutes to get your final photo.
Another consideration for star-trail photos is to include objects in the foreground of your shot.
You can use the ambient light from the moon to illuminate your foreground elements. Or you can light it up with artificial light such as a headlamp or a flashlight.
You may also want to insulate your lens so that it doesn’t fog up while you’re trying to get your shot.
This is a common occurrence when using long exposures on, particularly cold nights.
To do this cheaply, you can use socks or another piece of warm clothing and tie them around your lens using elastics.
Some other items to consider bringing as you capture star trails is a star chart or astrology apps so you can track the stars easily.
A warm coat and/or blanket; a flask of coffee, tea, or hot cocoa; and a book are also great items to bring to make the time pass quickly.
Bonus Tip:
All star-trails are centered above the north and south poles, due to the Earths rotation.
To locate this center position, you’ll need to find either the North Star, Polaris (if you’re in the northern hemisphere) or the South Star, Sigma Octantis (if you’re in the southern hemisphere).
All of the star trails will form a circle around these two points.
If you want to create circular star trails, point your camera at the North or South Star.
However, if you want straight star trails, try turning to the east or west and point your camera in that direction.
Lightning

To get a shot of the lightning, you’ll want to set up your camera on a sturdy tripod to avoid any camera shake.
You’ll also want to connect your camera to a remote shutter release button. These typically come in a wired or wireless format.
The wireless format will give you more freedom but you have to make sure you always have enough battery.
Start by setting your ISO, if your shooting in the day, use the lowest ISO settings.
On the other hand, if you are shooting at night I would start with an ISO of 200 and adjust if necessary.
It is also important that you set your shutter speed to “B” for bulb mode.
Bulb mode will allow you to hold the shutter open until the lightning strikes.
If your camera doesn’t have a bulb mode, you can set the exposure at 10-30 seconds, which should be long enough to capture the lightning.
Once you have a location, frame your shot, and hold down the shutter release button and wait for the lightning to strike.
Once the lightning strikes and disappears, you’ll want to let go of the shutter release button immediately.
You could also use a lightning trigger to help you time the release of your shutter.
A lightning trigger is a device that connects to your cameras hot shoe and triggers the shutter when it detects lightning.
When you are capturing lightning there are several factors the impact your settings. Specifically, your distance from the storm, the intensity of the lightning, and the pattern of the lightning.
If you are closer to the storm, then you will need a lower shutter speed, typically between 5 and 15 seconds.
If you are farther away from the storm, you will need to use longer shutter speed, anywhere between 20 seconds and 5 minutes.
Another thing to keep in mind is that if you are trying to capture a single lightning strike, you will need a much shorter shutter speed than if you wanted to capture multiple lightning strikes.
In most cases, using a small aperture is the best way to go.
Often, when you are capturing lightning, you are shooting with a wide-angle lens of a vast open landscape. To capture your scene with full sharpness and focus, you will need to create a deep depth of field provided by small apertures
Bonus Tip:
Lightning strikes can confuse autofocus lenses, so it’s best to turn off your autofocus and use manual focus.
It’s also recommended that you set your focus to infinity. This will ensure that you capture the lightning in sharp focus.
Light Trails
Cityscapes can make for some beautiful long exposure photos, especially when photographed at night.
The bright street lights, colorful neon signs, and the moving headlights all work to create a mesmerizing picture of modern-day life.
Light trail photography is all about capturing these entrancing photographic opportunities.
Similar to the way that water leaves trails when you leave the shutter open longer, light leaves trails in darkness.
If you use a longer exposure time, you can record traces of light from moving cars as they move across your frame.
The exact shutter speed to use will depend on the speed of the object you’re trying to photograph and how long you want your light trails to be.
Longer light trails will need to use longer shutter speeds that shorter light trails.
In general, you will need to use an exposure time that is at least 10-15 seconds.
For your aperture, somewhere between f/5 and f/11 will typically work well.
But again, this will depend on the amount of light in your scene and how long you want the exposure to be.
You should also have your ISO set as low as possible.
If you set your ISO too high, you risk overexposing your photo. This is especially true for photographing car headlights.
While you can experiment with the exposure time for these photos, you can also experiment with what time you want to try producing light trails.
It may be too light just after sunset to get effective light trails, so you might want to wait about half an hour to an hour after the sunsets.
Also, pay attention to the time when the streets are the busiest.
If you try to photograph too late at night, there may not be enough cars and lights on the street to create the aesthetic you want.
Bonus Tip:
Be careful not to get in the way of the cars you’re trying to photograph.
Don’t risk your safety by standing in the middle of roadways or on train tracks.
Be aware of the movement of the object.
Sometimes, photographers can get so caught up in what they are shooting that they forget to stay alert and be safe.
Architecture
Shooting architectural photography is best on overcast days.
Even more ideal is if there’s a little bit of wind.
The combination of wind, clouds, and long exposure can create stunning backgrounds behind architectural objects.
The right exposure time will depend on how fast the clouds are moving. Fast-moving clouds require shorter exposure than slow ones.
A good starting point is usually around 30 seconds, and then you can adjust accordingly.
Keep in mind that longer exposure time will cause your cloud streaks to appear longer and blurrier.
In contrast, shorter exposure times will make your cloud streaks appear more still in a photo.
The time of day that you shoot will also affect how your cloud streaks look.
For example, if you shoot in the middle of the day, your cloud streaks will most likely be a mixture of blue and white.
On the other hand, if you shoot during sunset, you may get some oranges or pinks mixed in.
Bonus Tip:
If the light is changing quickly (like during dusk or dawn where the sun is either setting or rising), you may need to underexpose or overexpose accordingly.
For example, If the light is fading, you may need to intentionally overexpose your images.
Conversely, if the light is increasing, you may need to set your setting to underexpose your images.
It’s best to expose for the lighting conditions you expect at the end of your exposure rather than the lighting when it started.
This will give you the best opportunity of properly exposing your image in cases when the light is changing rapidly.
Conclusion
Using long exposure photography is a great technique to create varying moods in your photos.
The biggest takeaway here is that you’ll have to experiment with the shutter speeds for each subject you shoot.
The smallest difference in exposure time can create an entirely different effect. So it’s best to experiment to see what works best for your aesthetic style.
Remember to be prepared and use the proper equipment.
Keep a tripod and ND filters on hand, and you’ll be all set to take some long exposure photographs whenever you have the chance.