Have you ever strolled through a beautiful forest in awe yet somehow unable to translate what you see into the camera?
It’s more common than you think. Forest, to me, is one of the most challenging subjects to photograph.
The scene is cluttered with too many elements, and it’s hard to make anything stand out.
To help, I’ve compiled a list of 20 tips I use to make forest photography trips more successful and fun.
Let’s dive in!
1. Use a Tripod
Forest lighting is unpredictable, so having a tripod in hand is always a good idea.
A tripod will give you more flexibility when adjusting your exposure settings.
With a tripod, you can use slower shutter speeds without compromising sharpness.
Using a tripod will also allow you to play with long exposures to create interesting effects.
I recommend bringing a light tripod to make it easier to navigate the forest.
If you are looking for a high-quality tripod that won’t break the bank, I recommend the Manfrotto Travel Befree Live Aluminium Tripod. You get the amazing build of a trusted brand but at a fraction of the price.
Resource: Best Budget Travel Tripods (under $200)
2. Use A Circular Polarizer Filter
A circular polarizing filter is another useful piece of equipment you can use when taking pictures in the forest.
You can use the circular polarizer to:
- Enhance colors and saturation
- Add contrast
- Remove reflections and glare
A CPL is a great way to remove any unwanted glare or reflections from wet surfaces such as leaves or rocks.
You can also use it to give water a smooth, silky appearance.
CPLs are also great for enhancing the colors in the scene and make your photos more vivid.
A CPL will enhance colors and contrast in your scene, making them more apparent and appealing to your viewer.
For CLP, I recommend the B+W HTC Kaesemann CPL. It works extremely well and produces very little artifacts. Plus the low profile design keeps it light and easy to use.
3. Experiment with Different Focal Lengths

When you’re shooting the forest, explore different angles and composition by varying your focal lengths.
Use Wide Angle Lenses
A wide-angle lens will give you a wider field of view and is an excellent option if you want to include multiple elements in your composition.
For full-frame cameras, I recommend a Nikon 16-35mm f/2.8. This lens is known for its excellent sharpness, ideal for capturing landscape scenes in great detail. It also has weather sealing, outstanding build quality, and exceptional image stabilization.
| Brand | Focal Length | Maximum Aperture | AF Motor | Price |
|---|---|---|---|---|
| Nikon | 16-35mm | f/4 | Yes | Check Price |
| Canon | 16-35mm | f/2.8 | Yes | Check Price |
| Canon | 16-35mm | f/4 | Yes | Check Price |
| Sony | 16-35mm | f/4 | Yes | Check Price |
| Sigma | 18-35mm | f/1.4 | No | Check Price |
Use a Telephoto Lens
Using a telephoto lens is a great way to focus on a specific region or element within your scene.
It’s also great for compressing your scene and capturing subjects far-away.
| Brand | Focal Length | Maximum Aperture | AF Motor | Price |
|---|---|---|---|---|
| Nikon | 70-200mm | f/2.8 | Yes | Check Price |
| Canon | 70-200mm | f/2.8 | Yes | Check Price |
| Canon | 70-200mm | f/4 | Yes | Check Price |
| Sigma | 100-400mm | f/5-6.3 | Yes | Check Price |
| Sony | 100-400mm | f/4.5-f.6 | Yes | Check Price |
Use a Macro Lens
Forests are rich in textures and colors making it perfect for macro photography.
Shooting the forest with a macro lens will enable you to capture parts of the forest that are typically missed by a regular observer.
Using a macro lens in the forest is a great way to experiment with unique subjects and compelling compositions.
| Brand | Focal Length | Maximum Aperture | AF Motor | Price |
|---|---|---|---|---|
| Nikon | 105mm | f/2.8 | Yes | Check Price |
| Canon | 100mm | f/2.8 | Yes | Check Price |
| Sigma | 105mm | f/2.8 | Yes | Price Check |
| Sony | 90mm | f/2.8 | Yes | Check Price |
4. Experiment With Your Aperture
There is not one perfect aperture to use when shooting the forest.
If you want to emphasize the detail of your scene, use a large aperture (between f/8 and f/11).
Large apertures will keep most of your frame in sharp focus.
To find the aperture setting that produces the sharpest image, use the aperture sweet spot.
The aperture sweet spot is 2-3 stops from the maximum aperture.
For example, if your lens has a maximum aperture of f/2.8, then your maximum aperture is between f/4 and f/5.6.
If you are looking to highlight the smaller areas of your scene, use smaller apertures (between f/1.8 to f/4).
Small apertures will create images with a shallow depth of field, leaving your background blurry and your subject in sharp focus.
Resource: Camera Basics: Aperture Explained (With Video)
5. Experiment with Shutter Speed

Different shutter speeds create different effects in your image.
Slow shutter speeds enable you to add a sense of motion to your image. In contrast, fast shutter speeds let you freeze motion and capture your subject in great detail.
If you are shooting streams or waterfalls in the forest, use long shutter speed to give water a smooth, silky finish.
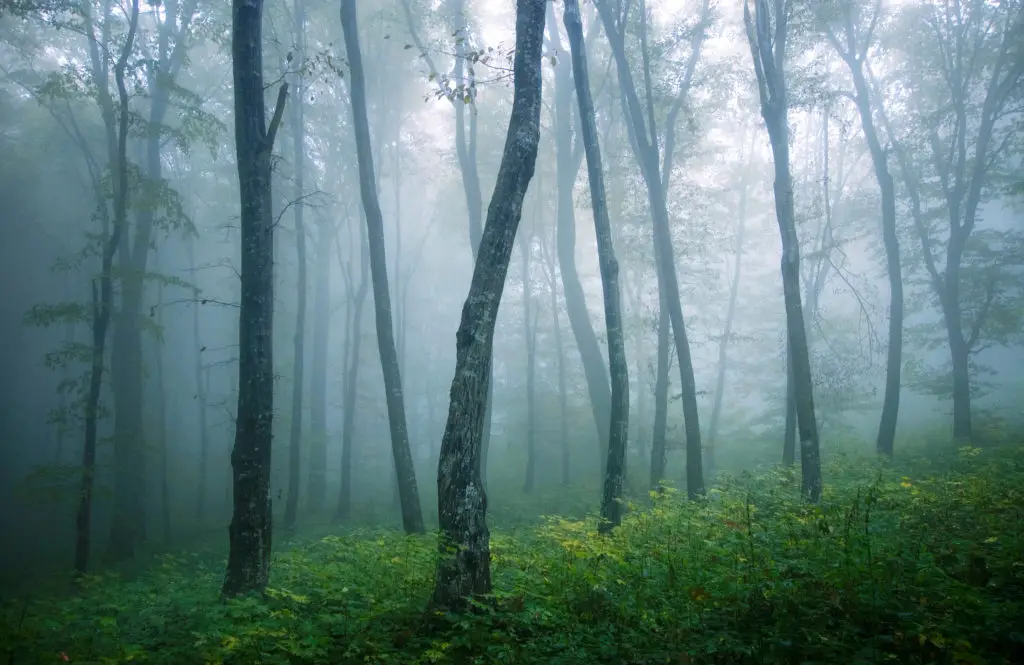
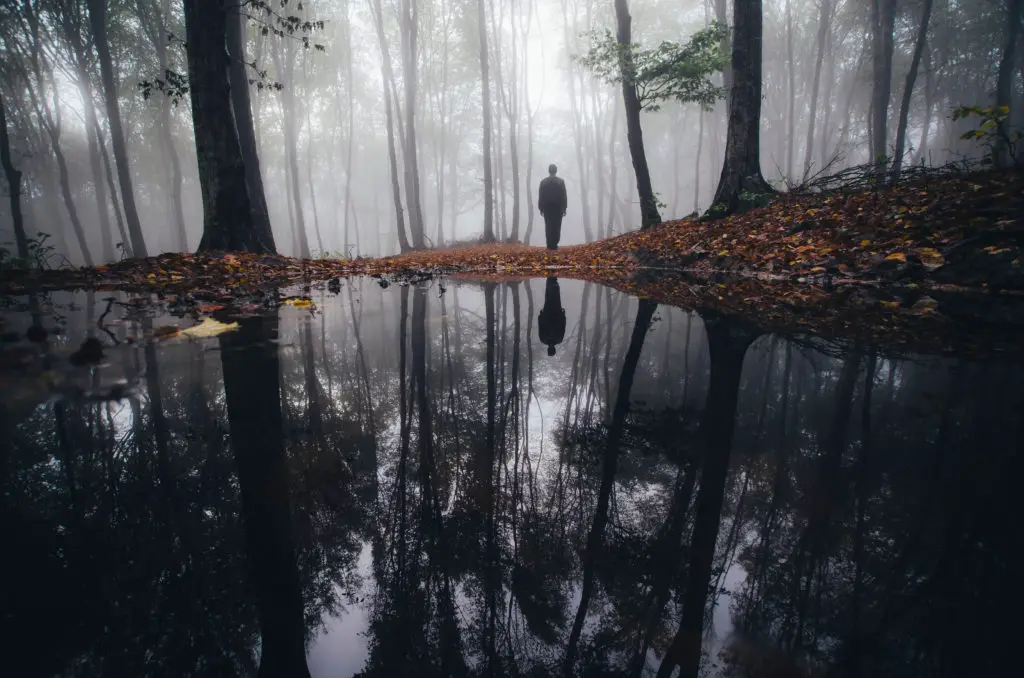
If there’s fog present in your scene, using a slow shutter speed is also a great idea as it can make the fog appear thicker and add a mythical quality to your images.
When using slow shutter speeds remember to use a tripod to prevent any camera shake from appearing in your image.
Resource: Camera Basics: Shutter Speed Explained (With Video)
6. Don’t be Afraid to Increase your ISO
Forest photography is often characterized by poor light due to the heavy foliage that blocks the sun.
To shoot properly exposed images, don’t be afraid to increase your ISO.
Most modern cameras allow you to increase your ISO up to 1600 without experiencing significant noise.
If you are shooting in daylight and there is heavy shade, consider increasing your between 200 and 600. On the other hand, if you are shooting at night, consider increasing your ISO between 600 and 1600.
7. Scout your Location
Because of the abundance of elements in the forest, it’s hard to spot ideal subjects and compositions right away. So, it’s important that you scout your location beforehand.
If you can, spend a day exploring your location and make a map of the places and trails you want to follow on the day of your shoot.
This will give you a better idea of what to expect.
The more you prepare for your shoot, the more likely your photo trip will be a success.
8. Shoot During Golden Hour
Many landscape photographers consider the golden hour one of the best times to take landscape photos.
Golden hour takes place during sunrise and sunset. The low angle of the sun during this time creates soft, subtle shadows and golden highlights that are ideal for taking photos.
Another benefit of shooting during sunrise is that it is usually accompanied by mist. Mist is a great way to add a nice mystical look to your images.
Finally, I love shooting during the golden hour because there’s it’s typically less crowded during this time.
This is especially true if you are shooting at popular tourist locations such as Sequoia or Yosemite National park.
Be sure to wake up early or stay late to take advantage of the beautiful light and peaceful atmosphere.
9. Visit During Different Seasons
Consider visiting the forest in each of the different seasons.
Different seasons can make the same forest look like an entirely different location. Visiting them at diffent times of the year will give you more compositional opportunities.
Remember to research the seasonality of the region you are visiting since seasons occur at different times of the year across the globe.
Summer
During summer, you will find that forests are full of lush, green vegetation. Summer is great for capturing fresh, vivid colors and active wildlife.
During early summer, you will also find that streams and waterfalls are their most full which can be wonderful to photograph.
Summer is also great because it typically produces the longest days with the clearest weather.
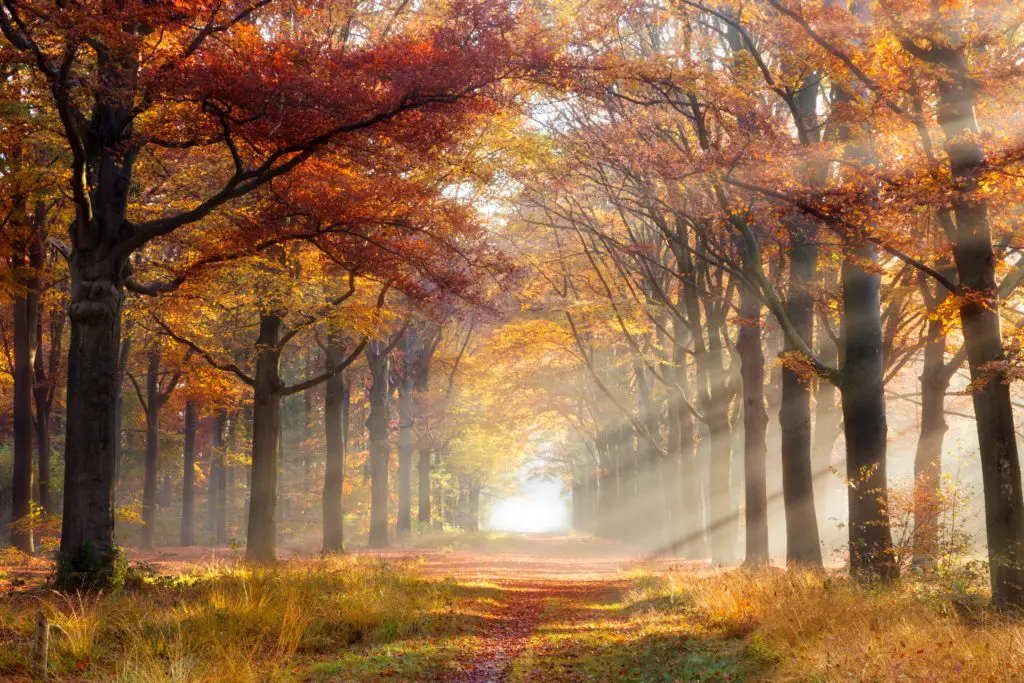
Autumn
In late spring and early autumn, you will find the richest colors of any season.
During this time, the leaves will begin to change color and fall from trees. The dynamic colors encountered during autumn are often incomparable.
While shooting during Autumn, you’ll be met with vibrant oranges, yellows, reds, and greens.
Fog and mist are also common during autumn, making for a spectacular combination of the changing colors of the forest.
Winter
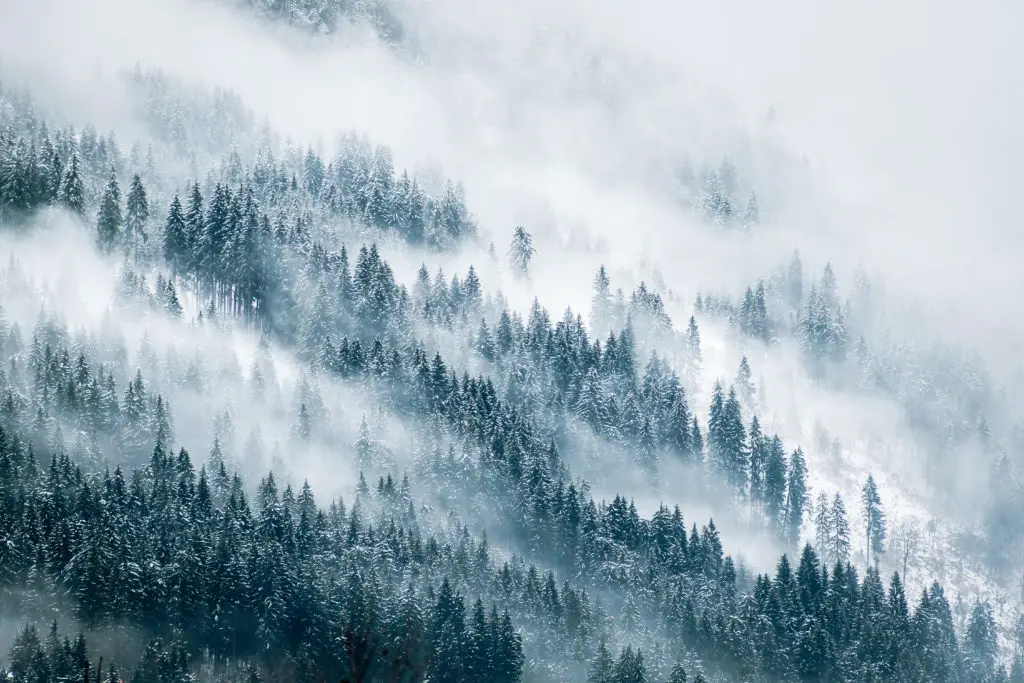
During winter, you’ll find that most trees have become barren, and snowfall or rain is common.
Shooting during winter is a great way to capture unique images. The barren trees and snow-covered landscapes create dynamic compositions full of emotion.
Shooting during winter is a great way to add variety to your images. Snow-covered landscapes can be breathtaking, especially if you capture the snow falling.
Spring
During spring, you will find that waterfalls and vegetation are starting to grow back and flourish. Images during spring give off a completely different mood than any other season.
If you are looking for full waterfalls, spring is the best time since all the rainfall and snow will not be melting.
10. Don’t Let Bad Weather Discourage You
There really is no bad weather when shooting landscape photography. “Bad” weather often produces some of the most amazing landscape images.
You can shoot amazing images in rainy, stormy, overcast, or sunny weather.
Similar to shooting during different seasons, shooting during different types of weather results in images that look strikingly different. This is a great way to add a new twist to locations that you have already photographed.
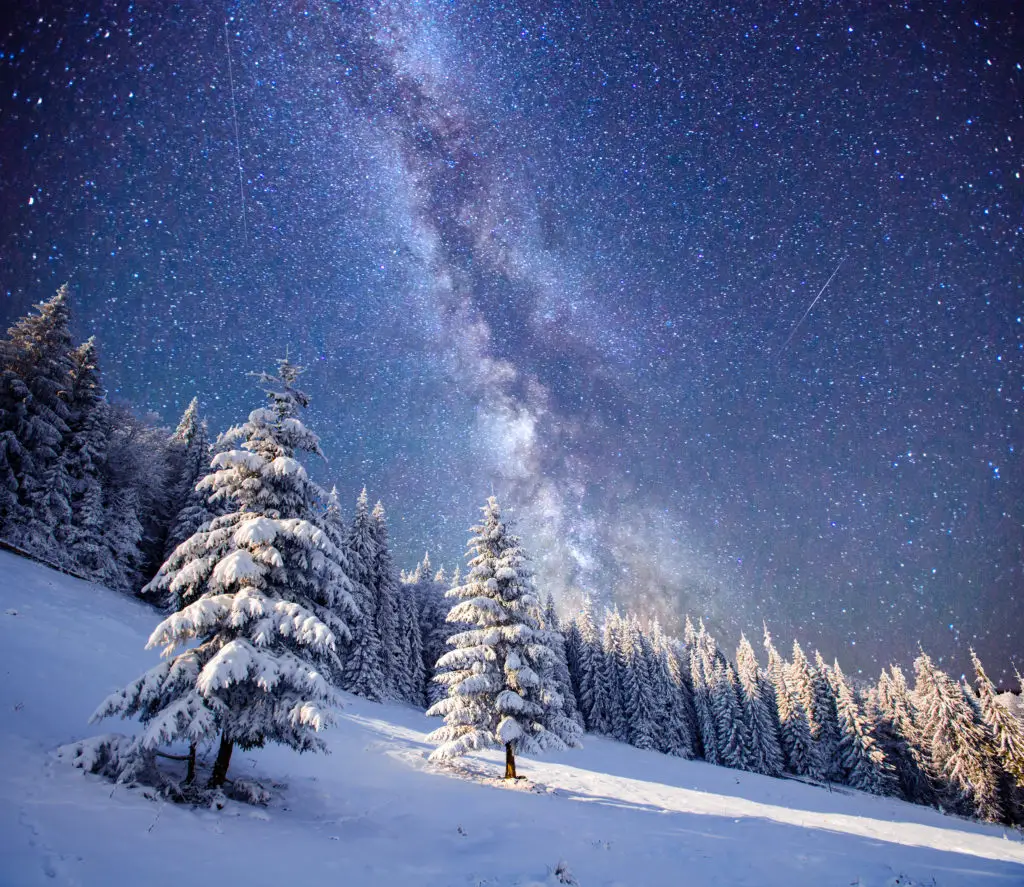
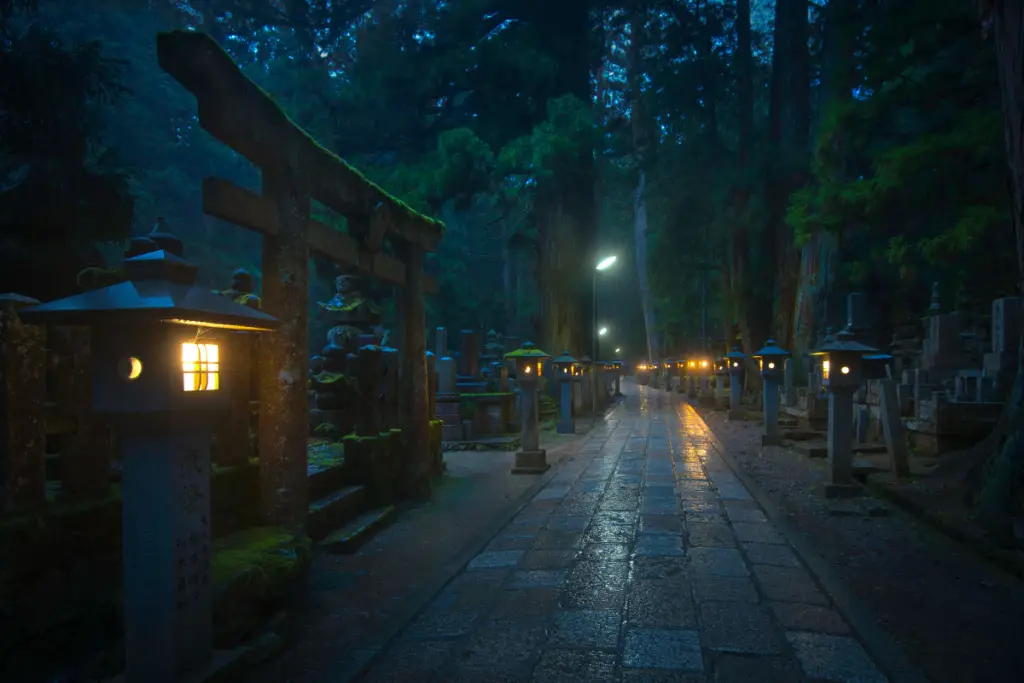
11. Shoot At Night
Another great time to shoot in the forest is at night.
The night sky is a great element to use to enhance the mood and appeal of your photo.
Shooting at night also opens up a location for several new compositional opportunities.
Capture the Night Sky Through the Forest
One of the most traditional ways of incorporating the night sky into your photos is to capture it through the forest.
To do this effectively, use a light source to illuminate your foreground to ensure that your foreground is visible.
Try to include the Milkyway, moon, or star trails in your shot for a more dynamic image that captivates your audience.
Create Silhouettes Against the Night Sky
Silhouettes are a great way to enhance the forms inside the forest while also highlighting the night sky.
To create silhouettes, you can point your camera upwards and use long shutter speeds to capture the sky’s elements.
This effect looks excellent when including the Milkyway or star trails in your shot.
You can enhance the elements in the sky by the forest’s silhouettes.
When shooting at night, use a wide aperture (between f/2 and f/5.6) to create a proper exposure. A wide aperture will let in more light into your camera allowing you to shoot brighter images in the dark.
You’ll also want to shoot with slow shutter speeds (between 1/30 seconds and 10 seconds). This will also enable you to shoot brighter images at night.
Slow shutter speeds will also allow you to capture star trails. For this, you’ll need to use a tripod to avoid camera shake.
Finally, use an ISO between 600 and 1600 to create brighter images.
Resources:
Star Trail Photography: A Guide from Preparation to Execution
17 Tips on How to Photograph the Milky Way + Cheat Sheet
17 Tips on How to Take Amazing Pictures in Low Light
12. Track the Sun and Use Different Types of Light

Different angles of light create can make the same subject look entirely different. And when captured between trees, it can create varying compositions ranging from calming to dramatic.
Sidelight
Sidelight can add dramatic effect in your composition.
You can use the trees in your image to cover the sun and create streaks of light into your image. This is a common technique used when there are plenty of trees in the region.
Sidelight typically occurs when the sun is low in the sky, so aim to shoot early in the day and late at night.
Use Backlight
Backlighting is a great way to add life and drama to your images.
Backlighting describes a scene where the source of light is behind the subject.
That is, the source of light for your photo is pointing toward your camera a while your subject between your camera and your light source.
Backlighting can add mood and drama to your compositions. Backlit subjects are often reduced to a silhouette, which can be visually stunning.
Resource: How to Take Stunning Images With Backlighting
13. Shoot In Vertical Format
Often times as landscape photographers we forget to use switch our camera into a vertical format.
Shooting vertically is a great way to guide your viewer’s eyes up and down your images rather than from left to right.
The vertical format is particularly useful in forest photography. Shooting vertically is a great way to add a sense of height and power to the trees in your scene.
Shooting in a vertical format is also great to eliminate distracting elements on narrow scenes.
For example, when capturing a photo of a narrow stream, using a horizontal format will help eliminate distracting elements on the sides of the stream.
14. Use different Perspectives
Low Vantage Point
Photographing from a low vantage point allows you to fill more of the frame.
You can use a low vantage point to instill a sense of authority and awe in your image. Subjects gain a sense of importance, power, and scale when taken from these angles.
A common example is shooting from a low vantage point to capture the full height of trees.
Shooting waterfalls from a low vantage point is another common theme in forest photography. Shooting from this angle makes the waterfalls look more powerful and compelling.
High Vantage Point /Ariel View
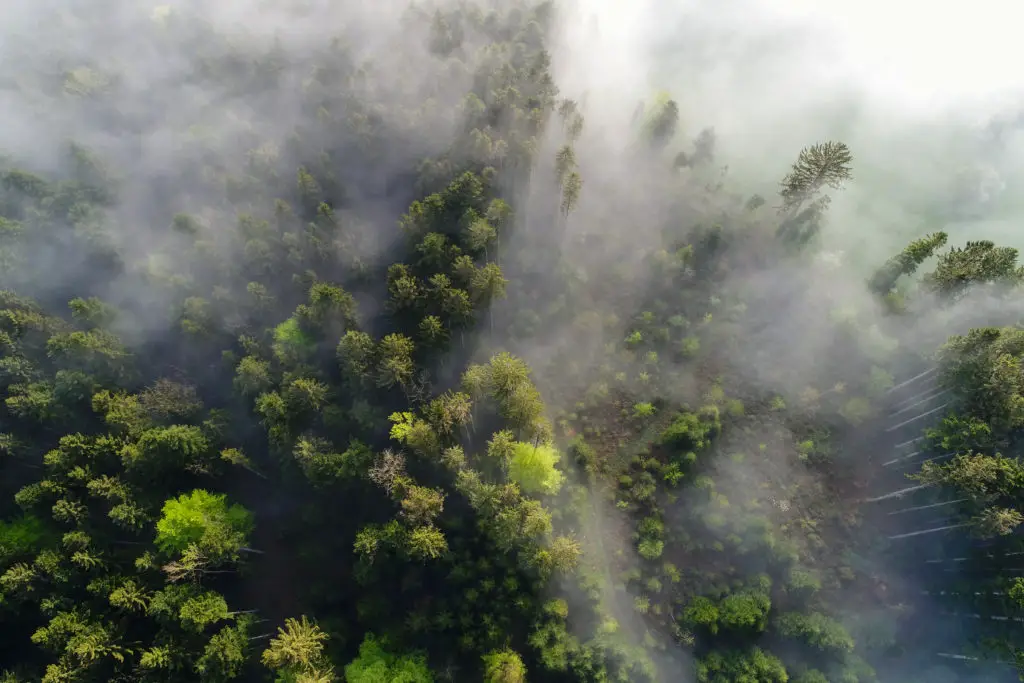
Photographing the forest from a high vantage point is a great way to capture the full breadth of a forest.
This angle of view detaches your viewer from the world below inspiring sensations of awe and the sublime.
It offers a unique perspective that viewers often don’t have a chance to see. The most common way to do shoot with this angle is by using a drone or a helicopter.
Resource: What Are Vantage Points and How to Use Them Photography
15. Shoot Abstract

Abstract subjects can provide a unique aesthetic quality in your composition. With no boundaries to abide by, abstract subjects allow you to experiment with creative ideas.
Forests contain many textures, colors, and patterns that you can use to create an abstract composition.
An easy way to do this is by zooming in close to your subject or by using slow shutter speeds.
For example, you can zoom in close to the tree branches to capture interesting patterns or textures.
You can also experiment with slow shutter speeds to capture patterns from moving leaves or branches in the forest.
The right shutter speed to use in this case will depend on two things: how fast your subject is moving and the effect you’re trying to create.
If you want to create abstract patterns and colors of the trees but maintain some level of detail, then I would recommend starting at 1/25 shutter speed.
However, if you’re not interested in details and simply want to paint your frame with streaks of colors from the trees, then you’ll have to start with much slower shutter speed.
16. Use Contrast to Highlight your Images
In photography, contrast is everything.
Contrast is the difference between bright and dark elements in your frame.
It’s the variation in contrast in your image that allows viewers to understand what they are seeing.
You can manipulate viewers’ responses to your images by making strategic use of contrast.
In particular, use high contrast to create narratives that induce strong emotions. Or you can use low contrast to generate calmer moods.
High contrast photos often evoke a stronger mood compared to low-contrast images.
If you want to generate a stronger emotional response, opt for high contrast scenes. In contrast, if you want to generate calmer moods use low contrast.
Resource: The Difference Between Clarity, Sharpness, and Contrast Sliders
17. Add Depth Using Layers
Depth draws viewers into a photograph. It provides perspective and helps the audience connect with an image on a deeper level.
One of the most effective ways to add depth to your images is by using layers.
When shooting forest, this can be easily done with rows of trees, flowers, or rocks you might encounter.
To do this effectively, make sure your image has a distinct foreground, background, and middle ground.
Having a clear distinction between your foreground and background will add depth by making it easier to understand that one must be closer.
To further enhance a sense of depth in your image, combine layers with the other depth signals such as contrast, focus, and scale.
Resource: Make Your Images Look 3D With These 10 Techniques
18. Use Leading Lines
Leading lines are a great compositional tool that you can use to guide your viewers to your subject.
Leading lines are parallel lines that meet and vanish on the horizon.
Viewers naturally follow leading lines until they converge, which an ideal tool to guide your viewers to your focal point.
Leading lines can be real, such as rows of trees, streams, paths, and bridges. Or they can be implied, such as beams of light and ripples on the surface of the water.
Resource: How to Use Leading Lines in Photography
19. Edit Your Images
It’s one thing to take a photo, quite another to edit it to perfection.
If you have seen an amazing image, chances are they are the result of good post-processing work and not just skillful shooting.
Editing software like Photoshop and Lightroom are invaluable investments in photography.
It is what will take your images from being good to remarkable, especially if you’re shooting in RAW.
You can upload RAW files into Lightroom and Adobe Photoshop and make changes to your image saturation, contrast, color balance, sharpness, and countless others.
To edit my images, I primarily use Photoshop and lightroom, but you may want to try out other editing platforms to see which one works best for you.
If you are looking for a free version I’d recommend GIMP. While it lacks advanced editing tools, it has most of the low to mid-level editing tools offered in Photoshop.
Luminar is another great alternative to lightroom and photoshop.
Luminar as a simple user interface making it easy to use. Plus, it has several AI features that will simulate photo editing for you. If your looking to perform basic to moderate level editing then your Luminar is a great option.
20. Safety First
To stay safe while you’re shooting, it is important that you come prepared.
Make sure that you are wearing the right type of gear for the weather you’re in.
For example, if it’s raining or snowing make sure you have rain jackets and protective gear for your camera.
It’s also important to be aware of the wildlife that is present in the forest. Be knowledgeable about the proper actions to take if you encounter dangerous animals.
Also, be mindful of where you are and where you are going.
If you decide to leave the trail make sure you are comfortable with the location or have an expert with you as a guide so you don’t get lost.
Also, don’t forget to bring water and snacks. Always anticipate packing extra in the event that you stay out longer than expected.
21. Protect the Environment
It is always important that you protect the environment you are visiting.
Don’t damage the forest you are visiting just to get a good picture.
Also, make sure you pick up after yourself one you leave. Don’t leave trash while you are in the forest.
You always want to leave the location you are visiting in the same condition that you found it. Be considerate and so others can enjoy the location as well.
Conclusion:
I wish I could tell you that by reading this post, you’ll be guaranteed to photograph forests successfully.
But the truth is, the only thing that can assure your success is if you go out there and shoot with your camera.
While these tips are useful, they’re merely guidelines.
Your ability to capture beautiful images will ultimately depend on your hard work and dedication.
So go out there. Take out your camera and implement these tips.
The forests are waiting for you.
Very good and interesting guide.really it’s helpful to shoot landscape photography.