F/Stop Chart
 Aperture and F/stop Cheat Sheet

 What are F/stop and Aperture?
 What are F/stop and Aperture?
If you are new to photography, you’ve probably heard f/stop and aperture thrown around quite often.
You are probably wondering what’s the difference and how are they related?
Before we begin aperture and f/stop, go hand in hand.
You can’t explain one without the other.
First, the aperture is the opening inside your camera lens.
If you look directly into your lens, you can see your aperture.
 The size of the aperture controls the amount of light that reaches the sensor.
Larger apertures allow more light into the camera.
Conversely, small apertures allow less light into the camera.
 F/stop is the value associated with specific aperture size.
Each time you adjust the size of your aperture, there is a corresponding f/stop value.
F/stops values are standardized, and each value represents a specific size of the aperture.
As a result, regardless of the lens you are using, your f/stop values will always let in the same amount of light and represent the same aperture size.
Smaller f/stops represent larger aperture openings and let in more light.
While larger f/stops represent smaller aperture openings and let in less light.
F/stop Calculation
There is a calculation that you can use to help you understand f/stop and aperture.
F/stops are how apertures sizes are measured.
More technically, it is known as the focal ration.
The formula is:
F/stop = f/n
Where f is the focal length, and n is the aperture diameter.
Using this formula, you can calculate how large your aperture diameter is for a given f/stop value.
Suppose you are using a 70mm lens, and you set your aperture to f/4.
If you calculate the aperture diameter, you’ll arrive at 17.5mm.
f/4 = 70mm / n
n= 70mm / 4
n = 17.5mm
What this formula shows is that there is an inverse relationship between aperture diameter and the f-stop value.
This means the larger your f/stop, the smaller your aperture diameter.
To show this, let’s say you change your f/stop to f/11. The aperture diameter is now 6.36mm.
f/11 = 70mm / n
n = 70mm / 11
n = 6.36mm
This shows that larger f/stop have smaller aperture diameters and let less light into your camera.
Likewise, smaller f/stops have larger aperture diameters and less more light into your camera.
F/stop Values: Full Stop, 1/2 Stop, and 1/3 Stop
Digital cameras have many f/stop values to choose from.
This can be overwhelming if you don’t understand what they mean.
In the chart below, you can see that there are three columns: full stop, 1/2 stop, and 1/3 stop.
These are the intervals that digital cameras allow you to change your f/stop value.
Each interval adjusts the f/stop value by a different amount.
To make this easier, I recommend you remember the full stops.
Here are full stops for f/values:
f/1, f/1.4, f/2, f/2.4, f/2.8, f/4, f/5.6, f/8, f/11, f/16, f/22
Remembering which values are full stops will help you determine if other stops are 1/2 or 1/3 stop adjustments.
When adjusting your f/stop, you will find that there is a pattern to f/stop values.
The pattern is 1 stop, 1/3 stop, 1/2 stop, 1/3 stop. After the second 1/3 stop, the pattern repeats.

Understanding how many f/stops values you need to skip before you have increased your f/stop by 1 full stop is important.
This is extremely useful when setting your f/stop values and trying to find the proper exposure.
F/stop and Depth of Field
Other than controlling the amount of light that enters your camera, your f/stop also controls the depth of field (DoF).
The depth of field determines how much of your image will be in focus.
More precisely, it is the area between the nearest and farthest part of the image that appears in sharp detail.
Using a small f/stop or wide aperture will give you a shallow depth of field.
With a shallow depth of field, only a portion of your image will be in sharp focus.
Using large f/stops or narrow apertures will give you a deep depth of field.
With a deep depth of depth of field most or all of your image will be in sharp focus.
Portrait photographers typically use a shallow depth of field to keep their subject in focus and blur out any distracting elements in the background.
 On the other hand, landscape photographers typically use a deep depth of field so that most of their image remains sharp and in focus.

Understanding and remembering the depth of field that f/stops values produce is confusing.
Here is a quick way you can remember:
Small f-number (Wide Aperture) = Small area 0f Focus or Shallow DoF
Big f-number (Narrow Aperture) = Large area of Focus or Deep DoF
Trade-Off: Exposure vs. Depth of Field
When choosing your f/stop, remember that there is a trade-off between exposure and depth of field.
Although small f/stops allow more light to enter your camera, it results in less of your image in sharp focus.
Conversely, although large f/stops allow more light to enter your camera, it results in more of your image in sharp focus.
Keep in mind that you can’t capture large amounts of light and keep most of your image in sharp focus by only adjusting your f/stop.
If your priority is depth of field, you will need to use your shutter speed or ISO to increase your image exposure.
On the other hand, if you want to use a shallow depth of field, you can use this to your advantage by using faster shutter speeds and lower ISO’s to capture a properly exposed image.
How Do you Change Your F/stop?
Most button locations will vary depending on the camera you are using.
The good thing is that the f/stop dial’s location is pretty standard on most cameras today.
In most cases, you can find the aperture dial on the front right-hand side of the camera.
 It is usually easily accessible with your right index finger.
Moving the dial to the right will increase your f/stop moving it to the left will decrease your f/stop.
If you can’t find your f/stop dial, you can look at your cameras manual to find the location.
If you don’t have your cameras manual handy, then a simple google search will help you find your aperture dial.
Google search your camera brand and model followed by user guide. Button locations can typically be found in the controls section of the manual.
Where is the F/stop value located?
The location of the f/stop value you are using varies depending on the camera you are using.
But there are typically two locations where you will find your f/stop value: front LCD screen and the top LCD control panel.
The place you can find your f/stop value is on the top LCD control panel of your camera.

The LCD control panel is very popular with Nikon cameras and other higher-end cameras but not a standard feature on lower budget cameras.
If your camera does not have the top LCD control panel, it will be located on your front LCD screen.
The f/stop value is typically at the bottom or top of the LCD screen.
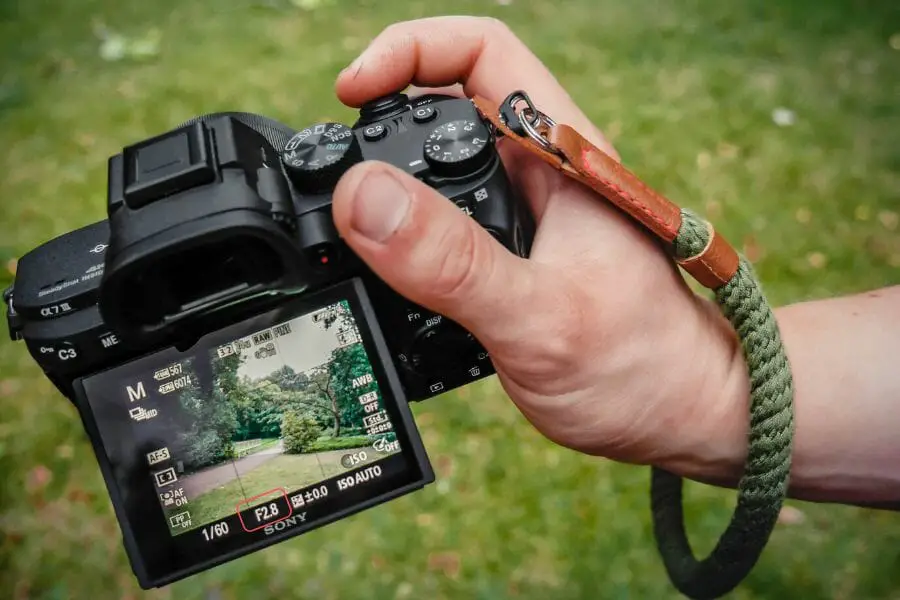 A great way to make this visible is to shoot in live view mode. In live view mode, you will be able to see all your exposure settings while you are composing your image.
Maximum and Minimum F/stop
The maximum and minimum aperture values you can use will depend on the lens you are using.
Maximum and minimum aperture values and f/stop values are a bit counterintuitive.
This is because the f/stop values are the opposite of the aperture values.
For example, the maximum aperture value refers to the widest aperture or smallest f/stop values.
Likewise, the minimum aperture refers to the narrowest aperture or largest f/stop.
Maximum Aperture
To reiterate, when discussing the maximum aperture of a lens, we are referring to the smallest f/stop.
The maximum aperture value determines how shallow of a depth of field you can create with the lens you are using.
Lenses with a high maximum aperture such as f/1.4 or f/1.8 allow you to create an extremely shallow depth of field.
On the other hand, lenses with a lower maximum aperture, such as f/4, may cause you to include unwanted elements in focus.
The maximum aperture is also an indicator of how “fast” the lens is.
Lenses with a higher maximum aperture are considered faster than lenses with a lower maximum aperture.
With a higher maximum aperture, you can use faster shutter speeds and achieve the same level of exposure.
Suppose on a lens with a maximum aperture of f/4; you need a shutter speed of 1/30 of a second to achieve a proper exposure.
On the other hand, with a maximum aperture of f/2, you can use a shutter speed of 1/125.
The additional two stops of f/stop allow you to use a shutter speed that is two stops faster.
The maximum aperture of a lens is typically located somewhere on the body of the lens.
The position of the maximum aperture will vary depending on the lens.
Some common locations include the front or side of the lens.
If you can’t find the maximum f/stop on your lens, you can check by lowering your f/stop value until it can’t anymore.
If you move your aperture dial to the left and your value does not change.
When your f/stop does not go any smaller, you have reached your maximum aperture.
Minimum Aperture
The minimum aperture is the narrowest or largest f/stop.
The minimum aperture value is not as important when purchasing a lens.
For most lenses, the minimum aperture is f/22, and most photographers avoid using the minimum aperture.
Photographers typically avoid using the minimum aperture due to diffraction and lack of sharpness experienced at these aperture settings.
F/stop and Camera Modes
Choosing your f/stop is important when you want to maintain control over your depth of field.
If you allow your camera to set your f/stop, you won’t have control over what elements are in focus.
If you want to keep control over your f/stop, you need to shoot in aperture priority or manual mode.
When shooting in any other mode, your camera will set your f/stop for you.
In aperture priority, you set your aperture and ISO while your camera sets the shutter speed.
This setting is a quick and efficient way of achieving a proper exposure while maintaining control over your depth of field.
In manual mode, you set all three exposure settings.
Manual mode is harder and more time-consuming than aperture priority, but it gives you the most creative freedom.
In manual mode, you will be in full control of exactly how you want your image to look.
[…] The aperture chart from Vinci Palad can be found here […]